
In April 1964 the Ford Motor Company introduced the first generation of the Mustang – dubbed “the 1964 1/2 model” by Mustang fans. The following year saw the appearance of the first official production models of the new vehicle, and the ’65 Ford Mustang made history by becoming the automaker’s most successful launch since the Model A in 1928.

The Mustang literally turned the American automotive industry upside down, inaugurating an entirely new class of affordable American sports cars known as “the pony class”, featuring long, sleek hoods and short, compact rear ends. They were sexy, and best of all, they were affordable! Ford’s new Mustang preceded and inspired other great, and now classic, car designs of the mid-sixties: like the Chevrolet Camaro, the Pontiac Firebird, and Chrysler’s first edition of the Dodge Challenger. Today the Ford Mustang is in its sixth generation of production, proving that a true classic never dies.
That same year likewise saw the launch of yet another new and equally exciting product design in American manufacturing. This time it was an electric guitar, and it was also called the “Mustang”. Introduced in 1965 by Fender Electric Instrument Company, Inc., the new Fender Mustang® guitar was a highly successful addition to the company’s product line, added at the very beginning of Fender’s storied “CBS era”.
The Mustang launched as a student model electric guitar, offering a smaller body, a choice of two shorter scale lengths, and a decidedly different electronics design than its ubiquitous and well established cousins, the Stratocaster® and Telecaster®. It also had a smaller price tag than the widely popular Strat and Tele models. In addition to it’s shorter, more comfortable scale, the Mustang also sported a vibrato with a radically different stop-bar tailpiece and suspension system, and a shorter, more comfortable whammy bar. Dubbed the “Dynamic Fender Vibrato®”, it was unique to the Mustang and has appeared on no other Fender guitar before or since.
There is no question that Leo Fender was as much a brilliant marketeer as he was innovator. He knew a “hit” when he saw one, and Fender was indeed successful introducing a concept guitar like the Mustang at just the right time to leverage the market frenzy that ensued from Ford’s sporty new pony car of the same name. Some may say it was “just coincidence.” Nevertheless, the car and the guitar were both popularly priced, had a strong market appeal, and both saw overwhelmingly huge sales in their respective markets. Fender even mimicked many of the popular finishes being offered in that era by the automotive industry, and successfully incorporated those ideas into their catalog of guitar products. The new Fender Mustang, which saw an original production run in the USA from 1965 to 1982, offered finishes in Daphne Blue, Dakota Red, Olympic White, Competition Red, Competition Blue, Competition Orange, and Sunburst. It came in a 21 fret, 22.5″ scale model, and the more popular and prolific 22 fret, 24″ scale model. Both the car and the guitar represent prime examples of classic 20th century American manufacturing from what historically may in many respects have been America’s heyday.
Now if you’ll allow me to gush a little about this great guitar…
I’m a “boomer” kid, born in March 1955, and raised in Hillside, IL, a western suburb of Chicago. When the Ford Mustang came out in April of 1964 I was 9 years old. In February of that same year the Beatles appeared on the Ed Sullivan Show and started what became a musical cultural revolution known as “the British Invasion”. That same year my brother and I started learning to play the guitar, and in January of 1965 I began taking guitar lessons at a local music store called Monti’s Music Center on Butterfield Road in my hometown. For Christmas that year my folks bought me a red National Newport 82 model electric guitar. My first guitar. I loved that red National guitar, and I still have it to this day. But secretly I drooled and lusted for a red Fender Mustang that hung on the wall at Monti’s. It was calling my name!
Ironically, in 50 plus years of playing guitar the Fender Mustang® was the one I always wanted but strangely never acquired.
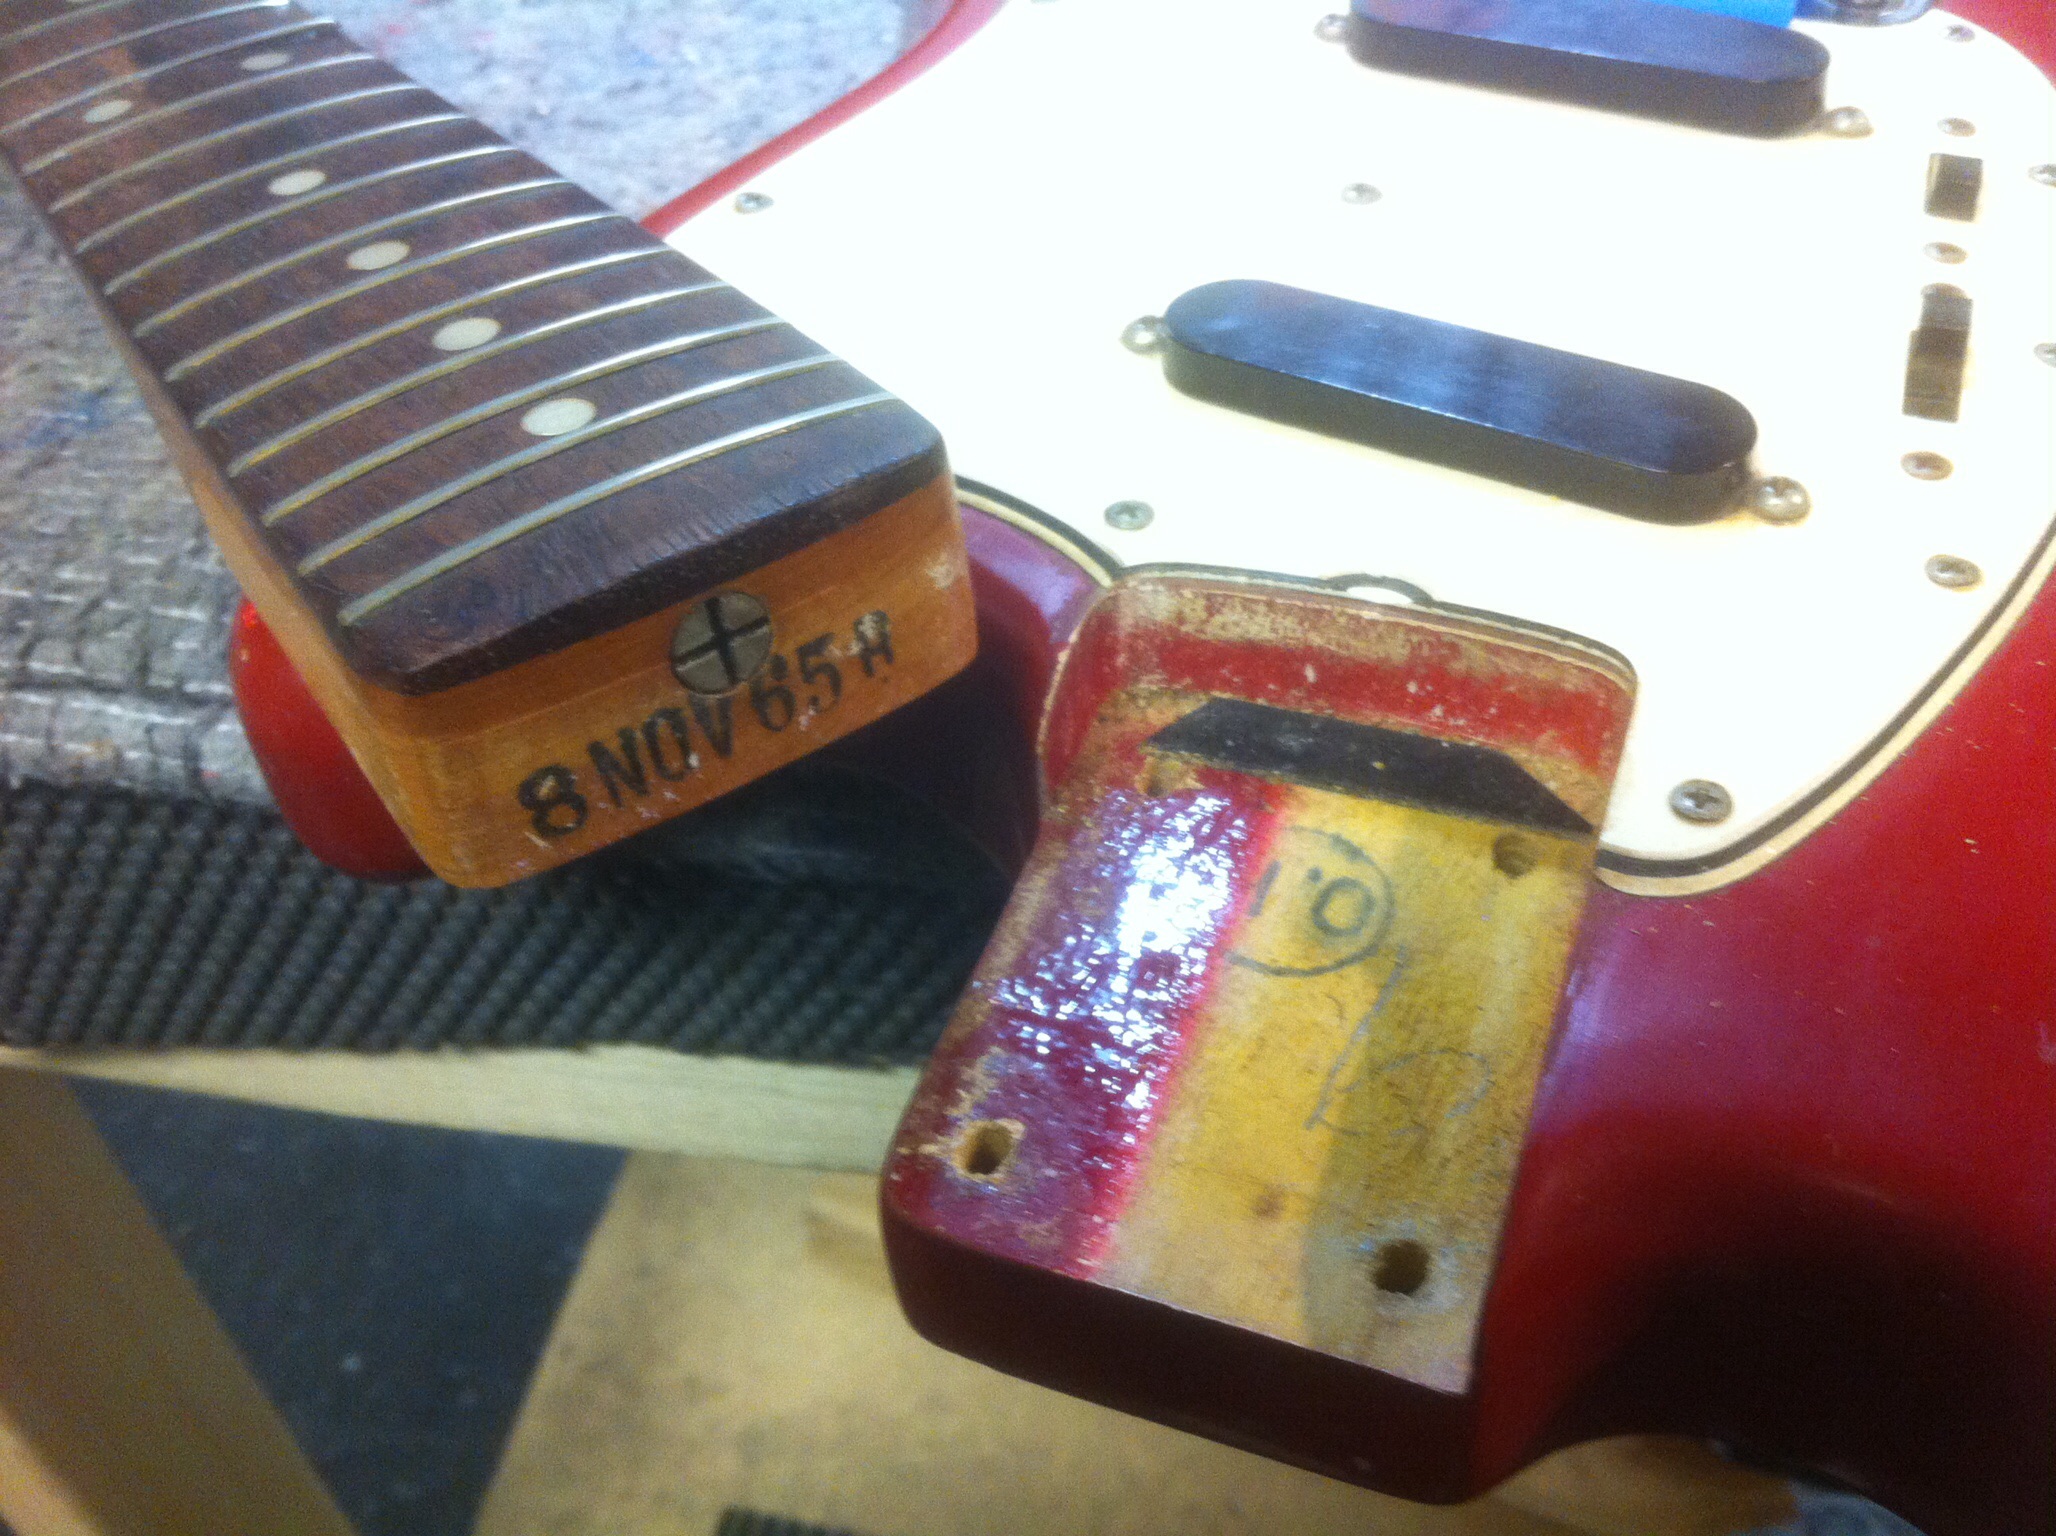
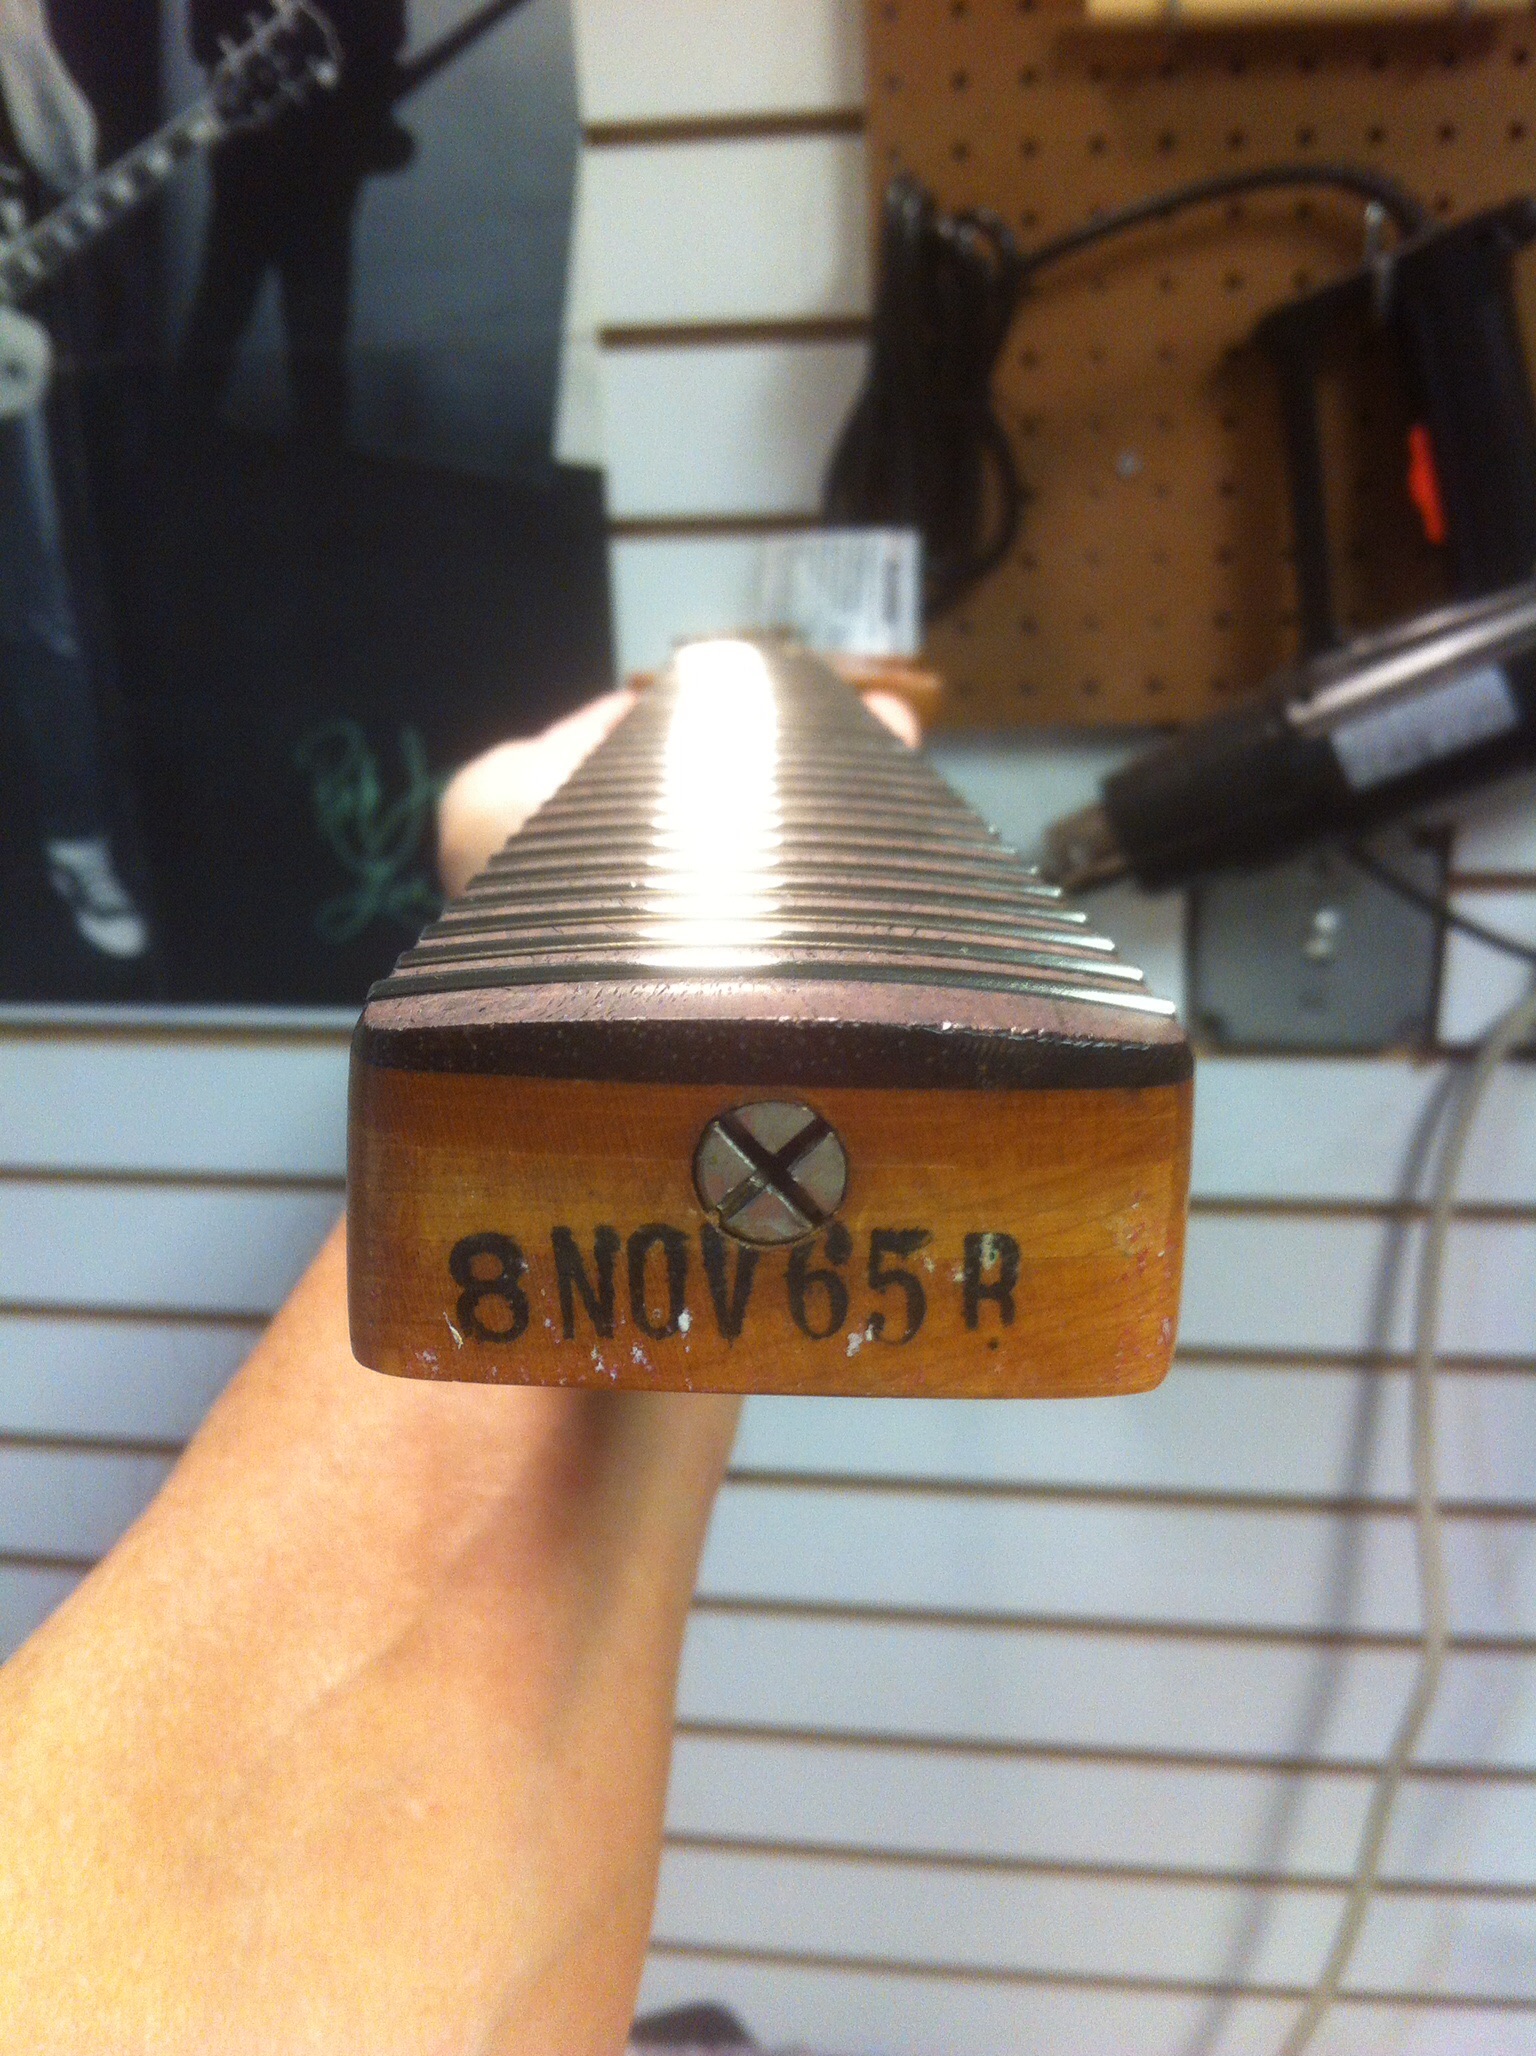
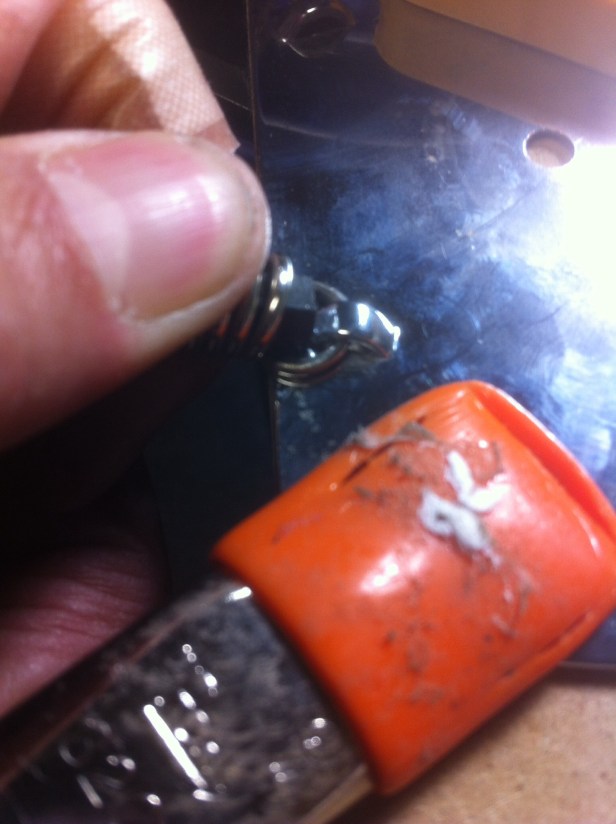
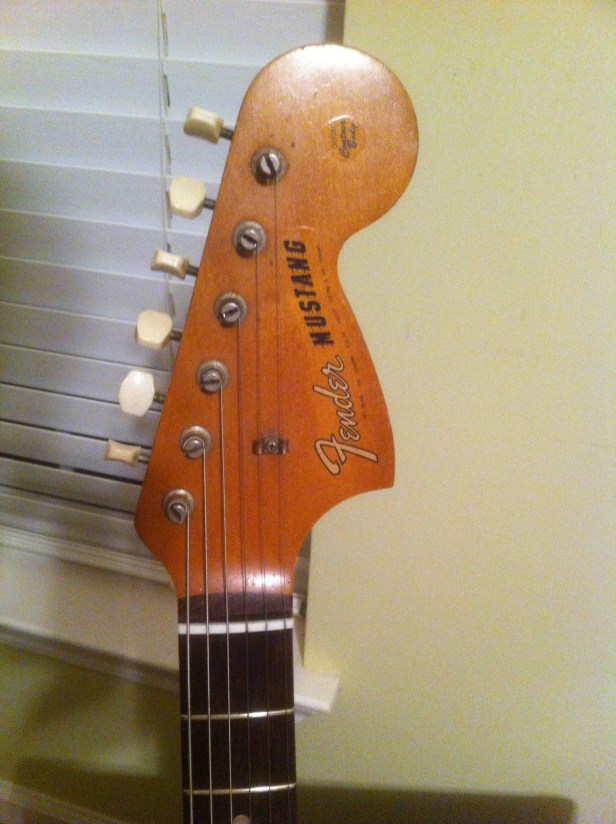
The factory date stamp and neck profile type.
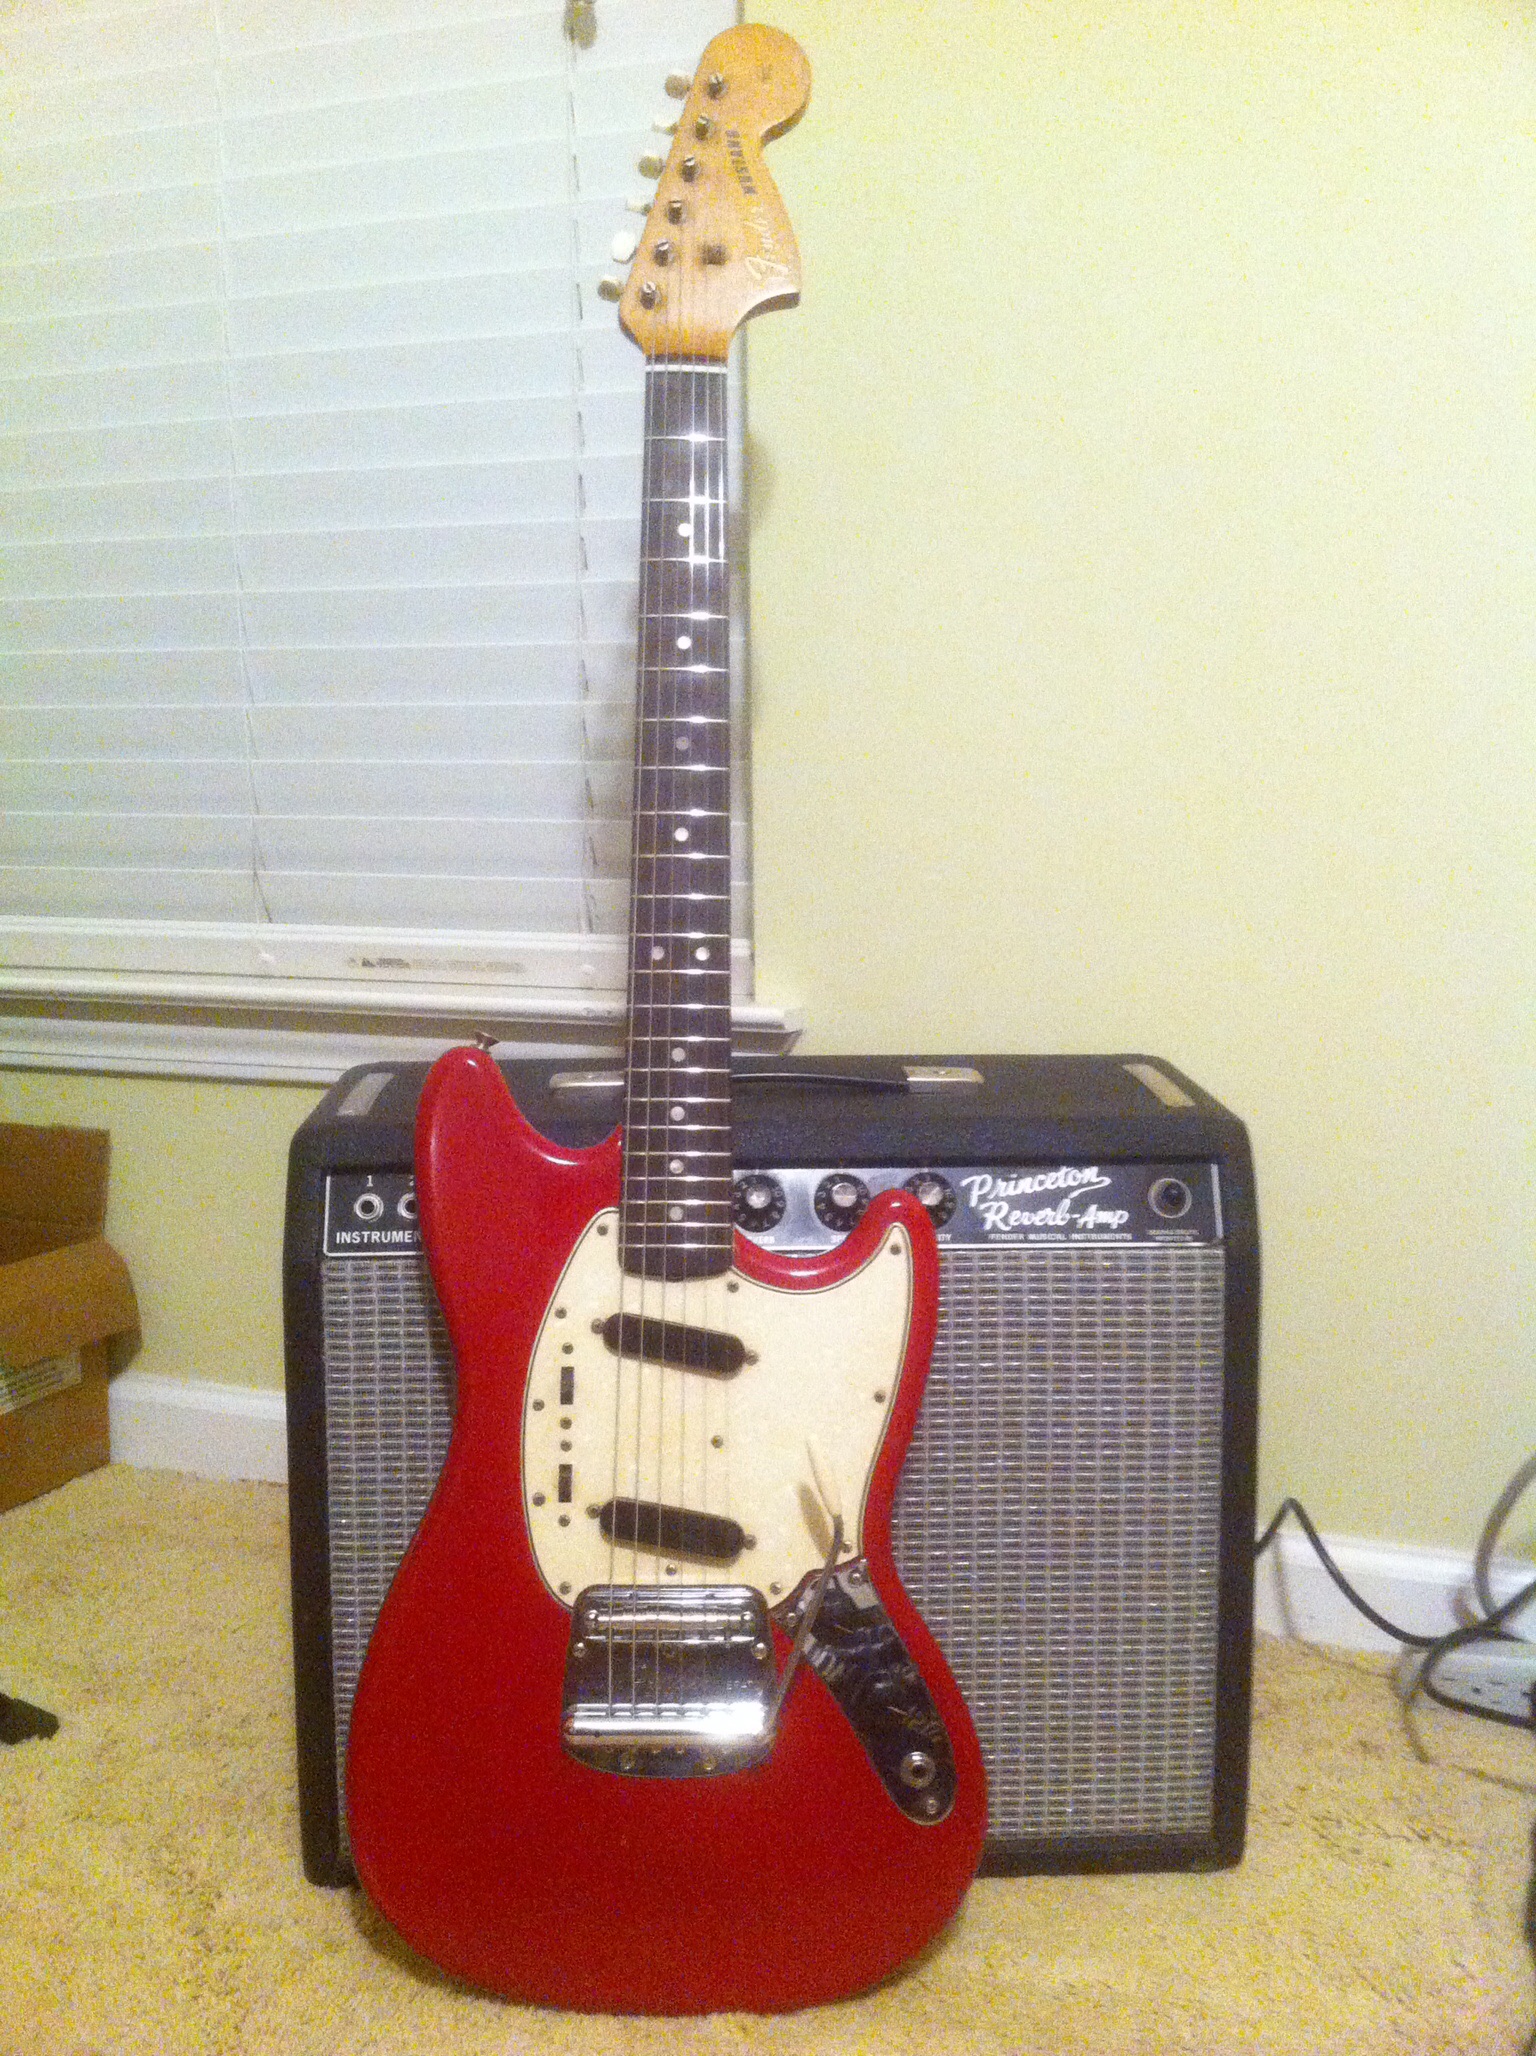
Then lo and behold, as the Karmic wheel spins, this Fender Mustang – a 1965 Dakota Red Fender Mustang, to be exact – in all original condition comes into my Savannah GA workshop in January of 2015 for a refret and restoration. The picture at right shows the instrument disassembled with the date stamp clearly visible on the neck. What a special treat and privilege it was to work on it, too. A real throwback.
I took lots of pictures of the repair and setup process while the guitar was in my shop. This is one of my dream guitars, and I wanted to showcase it not only because of its unique features – like the “Dynamic Fender Vibrato”, and the completely unique electronics – but especially to inform others of the setup requirements on this unique instrument; specifically with respect to the vibrato tailpiece, bridge, and string tension mechanisms. It was murder to setup! I had no idea what I was in for and actually had to fabricate a couple of new tools just to get the setup done right. But that’s lutherie! Some days you have to love it just to get through it! And at the end of the day, everyone went home delighted! Call it a “labor of love”!
And now for some more shots of the repair, restoration, and setup of the ’65 Fender Mustang…
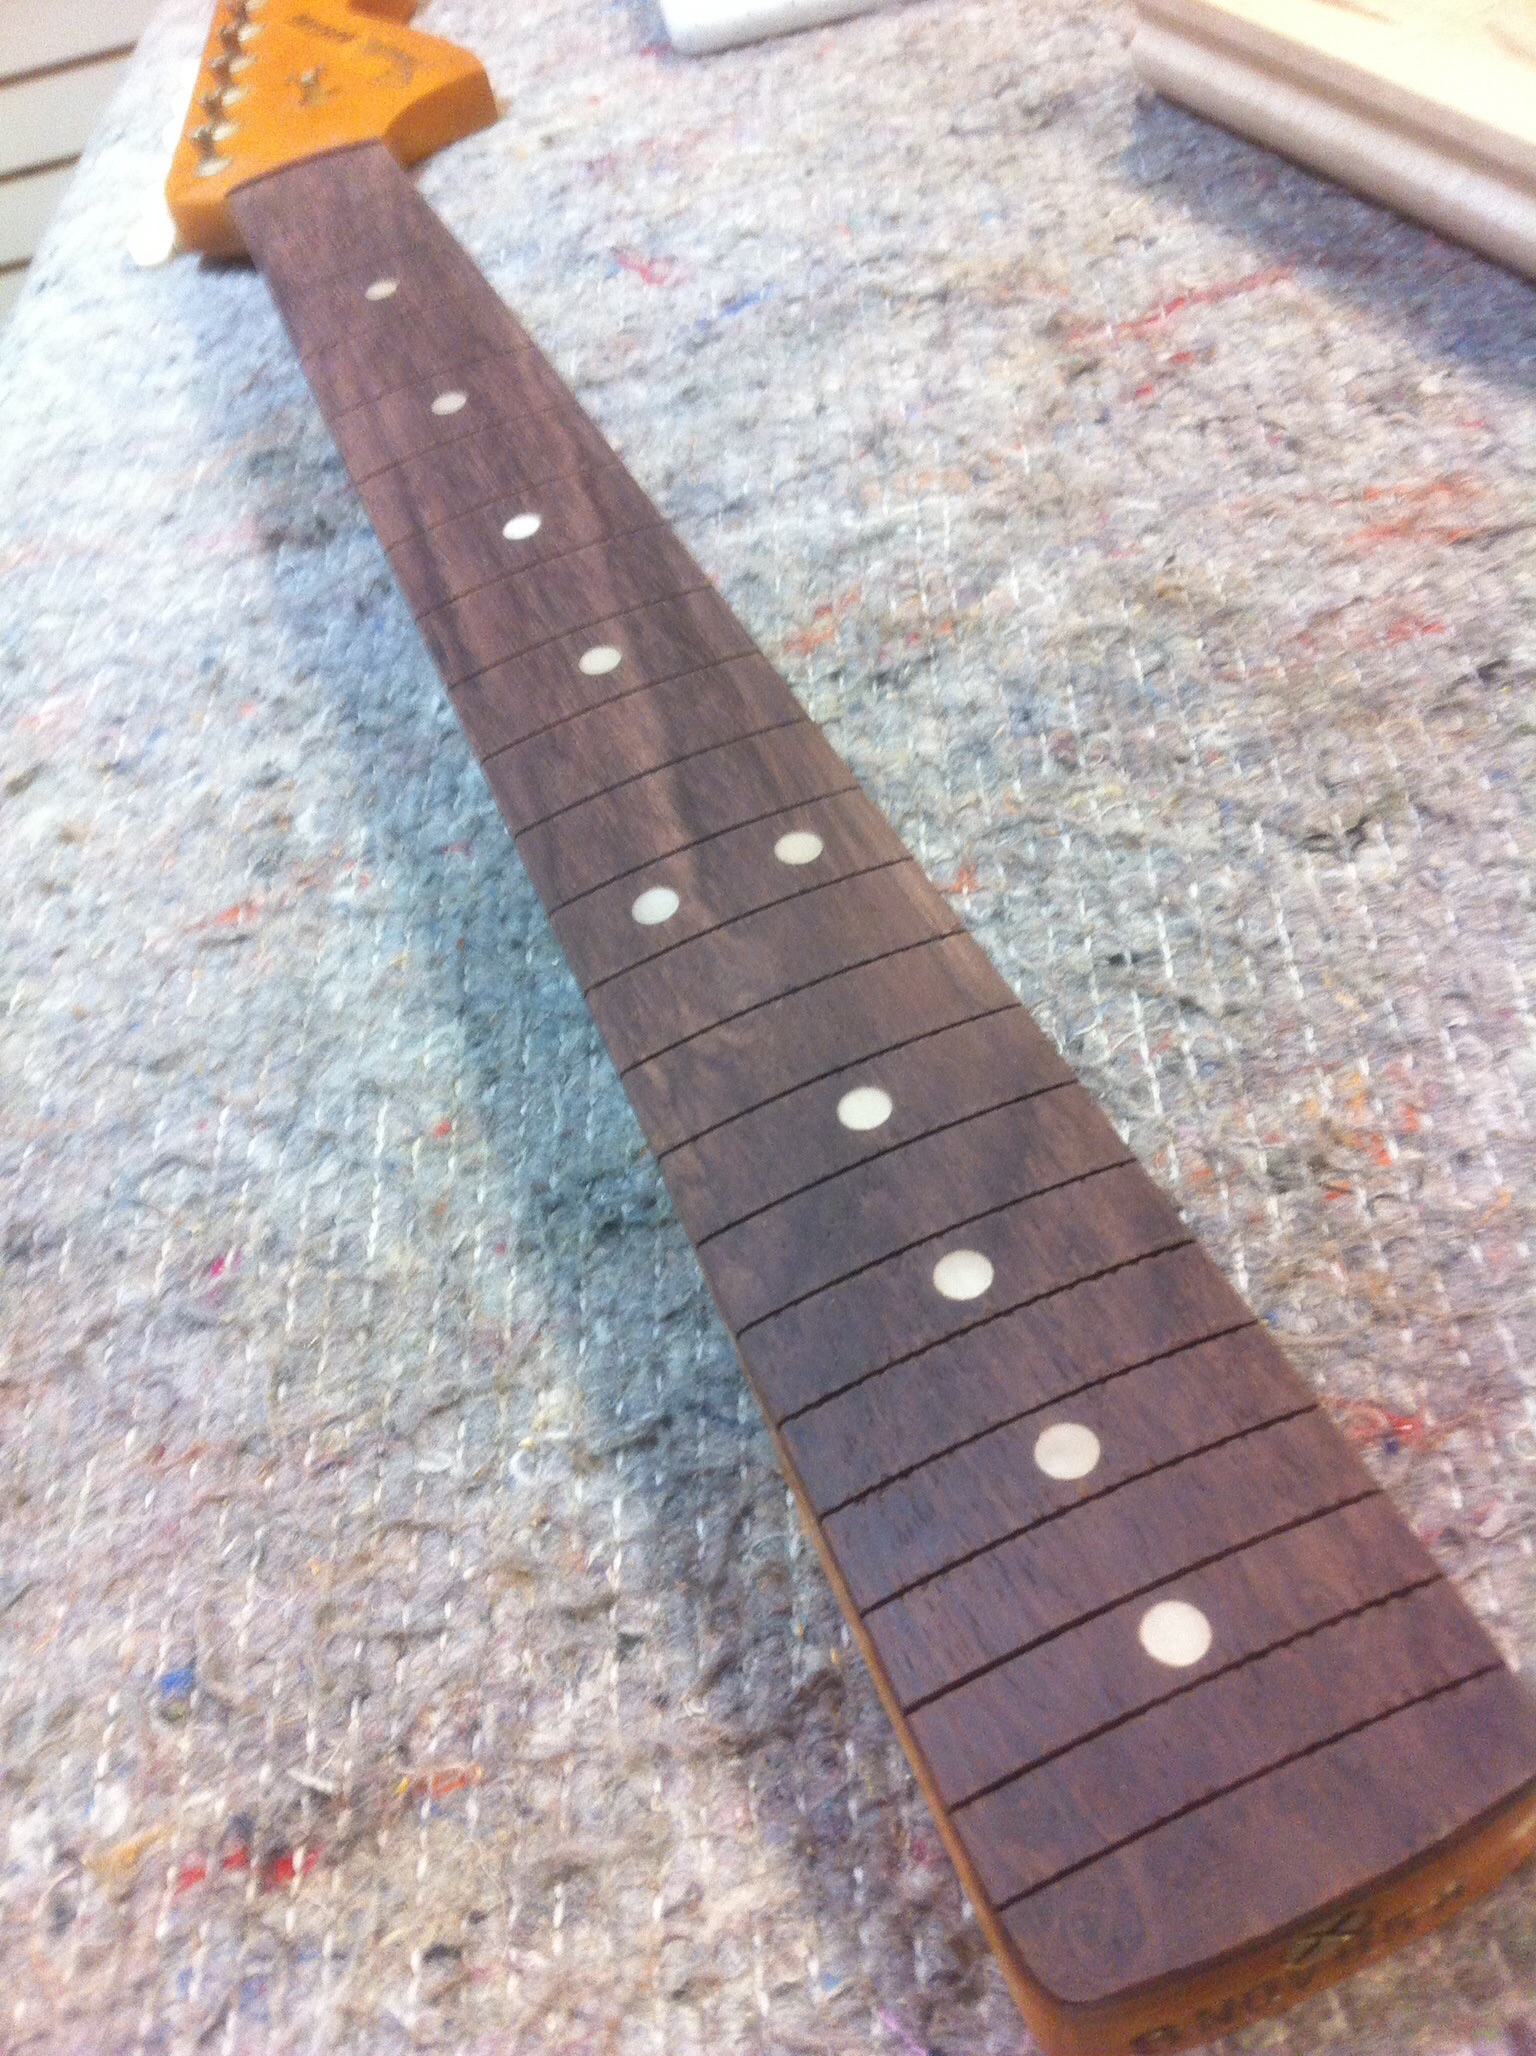
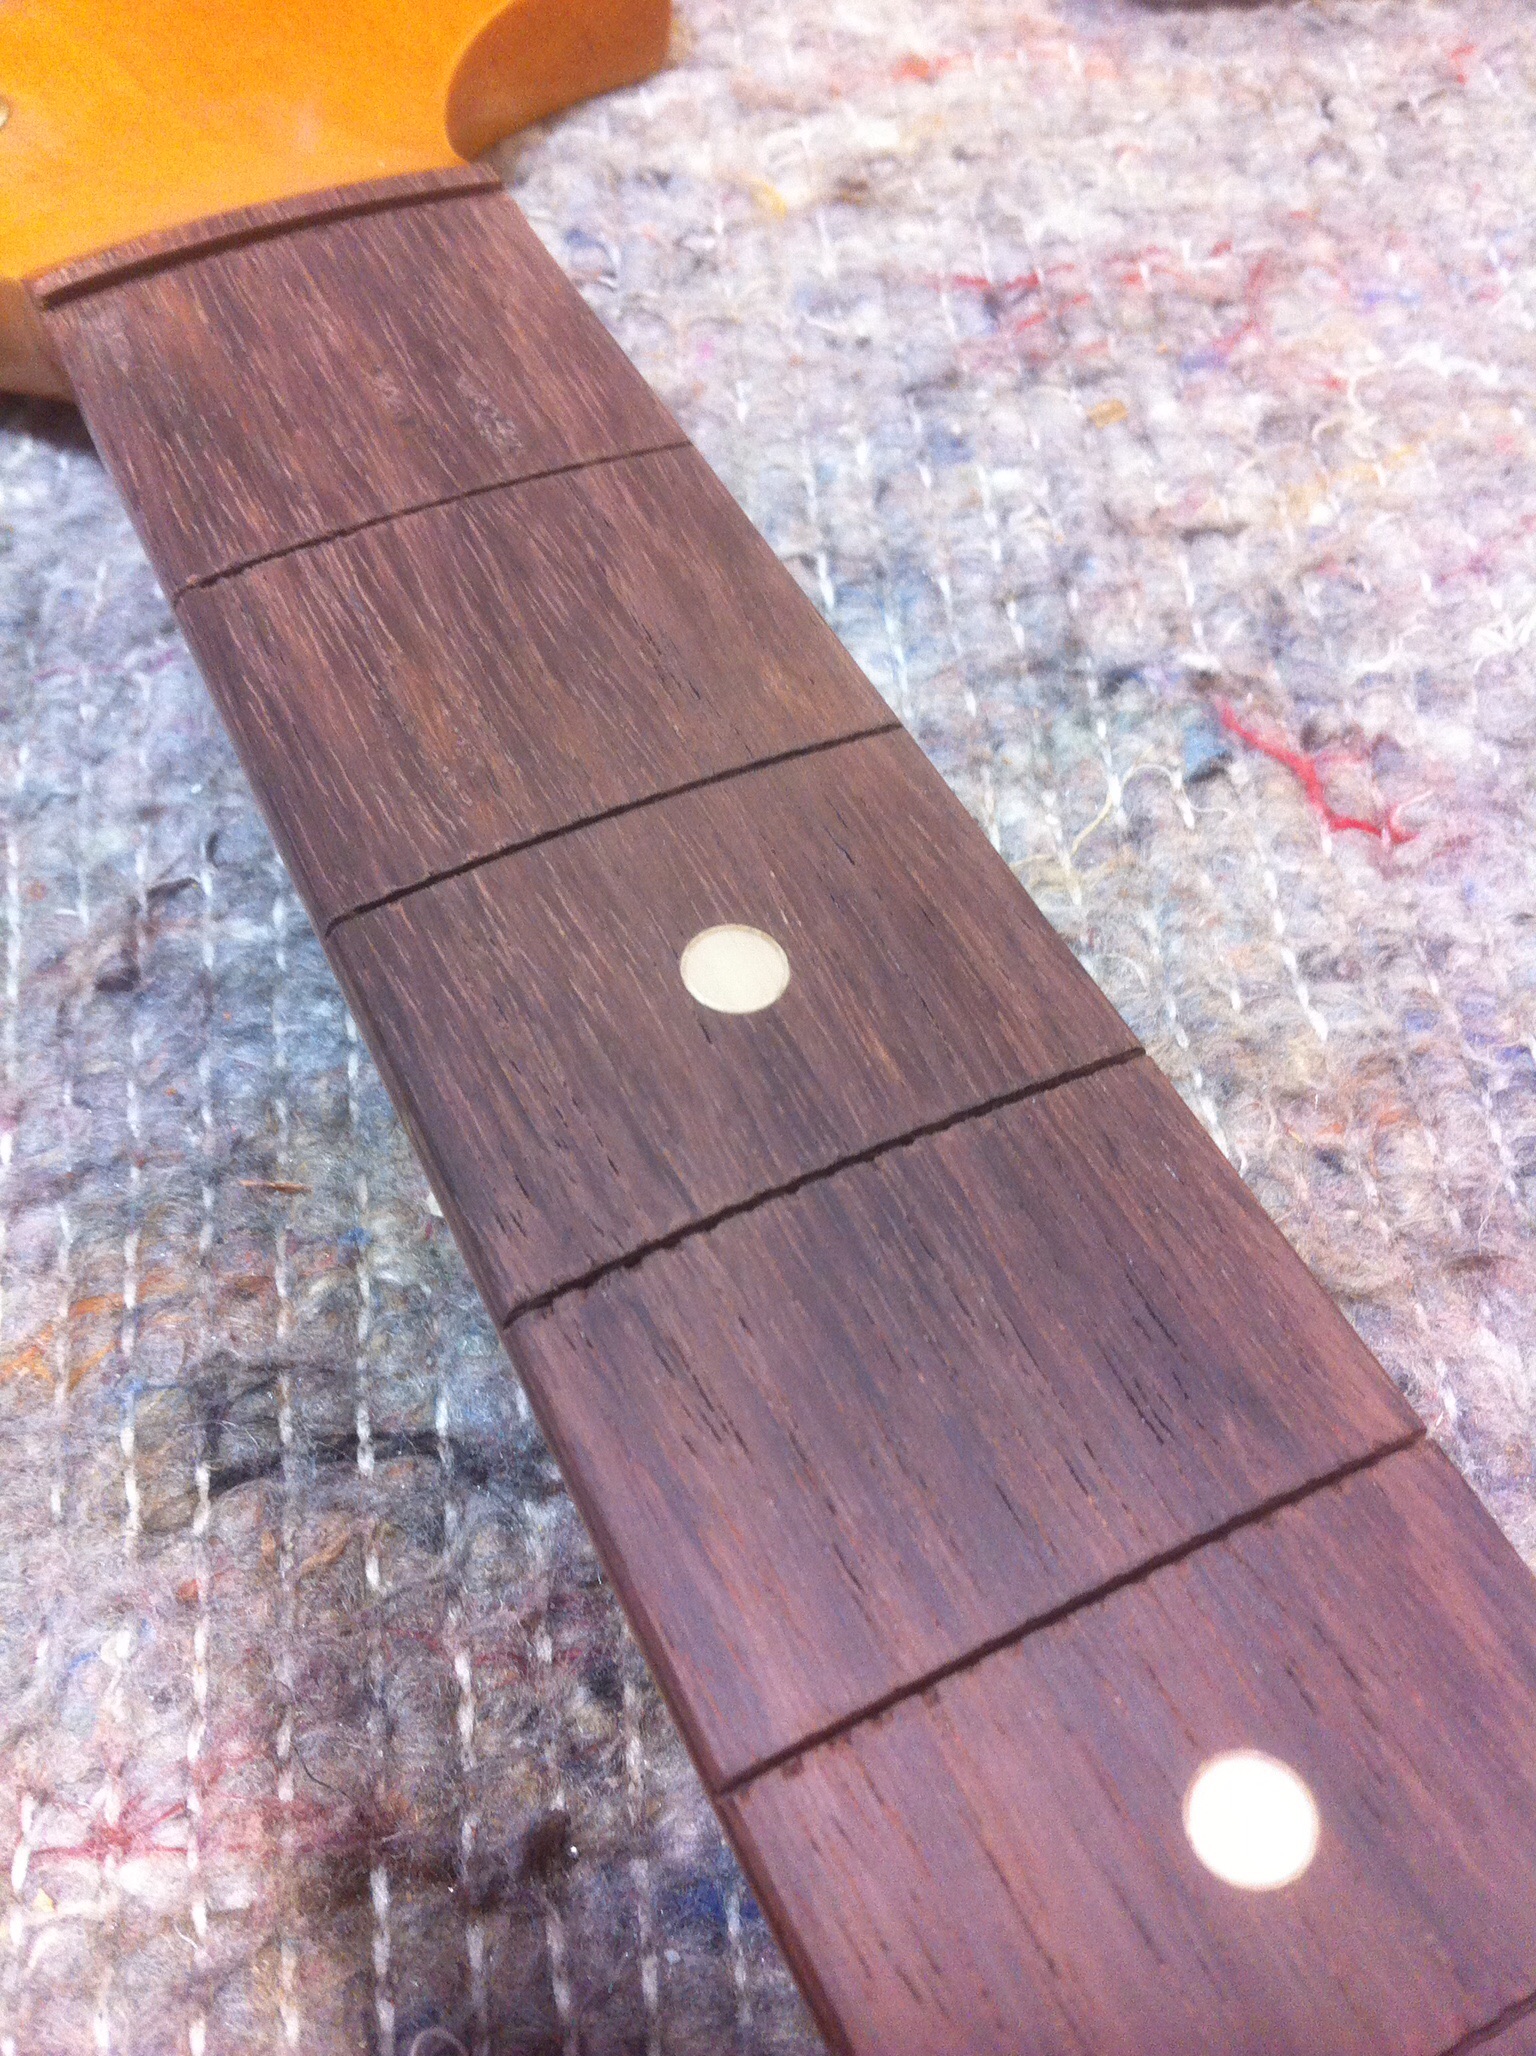
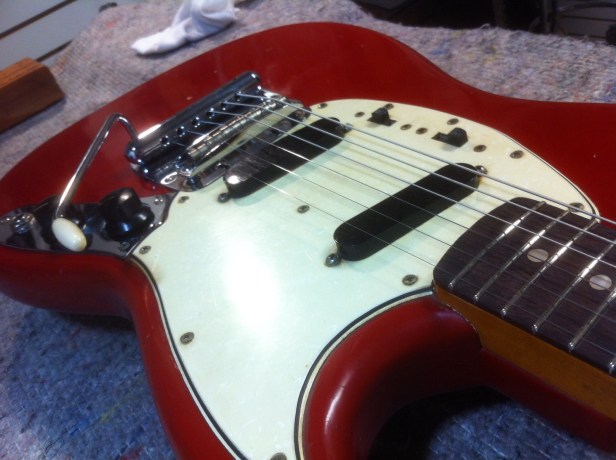
The guitar’s fretboard was nearly 50 years old. As can be seen from the pics here it had been played – a LOT! The original frets were toast, so a refret was a must-do on this neck. The Brazilian rosewood fretboard also had quite a bit of damage from wear and tear, presenting a few places where missing wood needed to be drop filled and replaced.
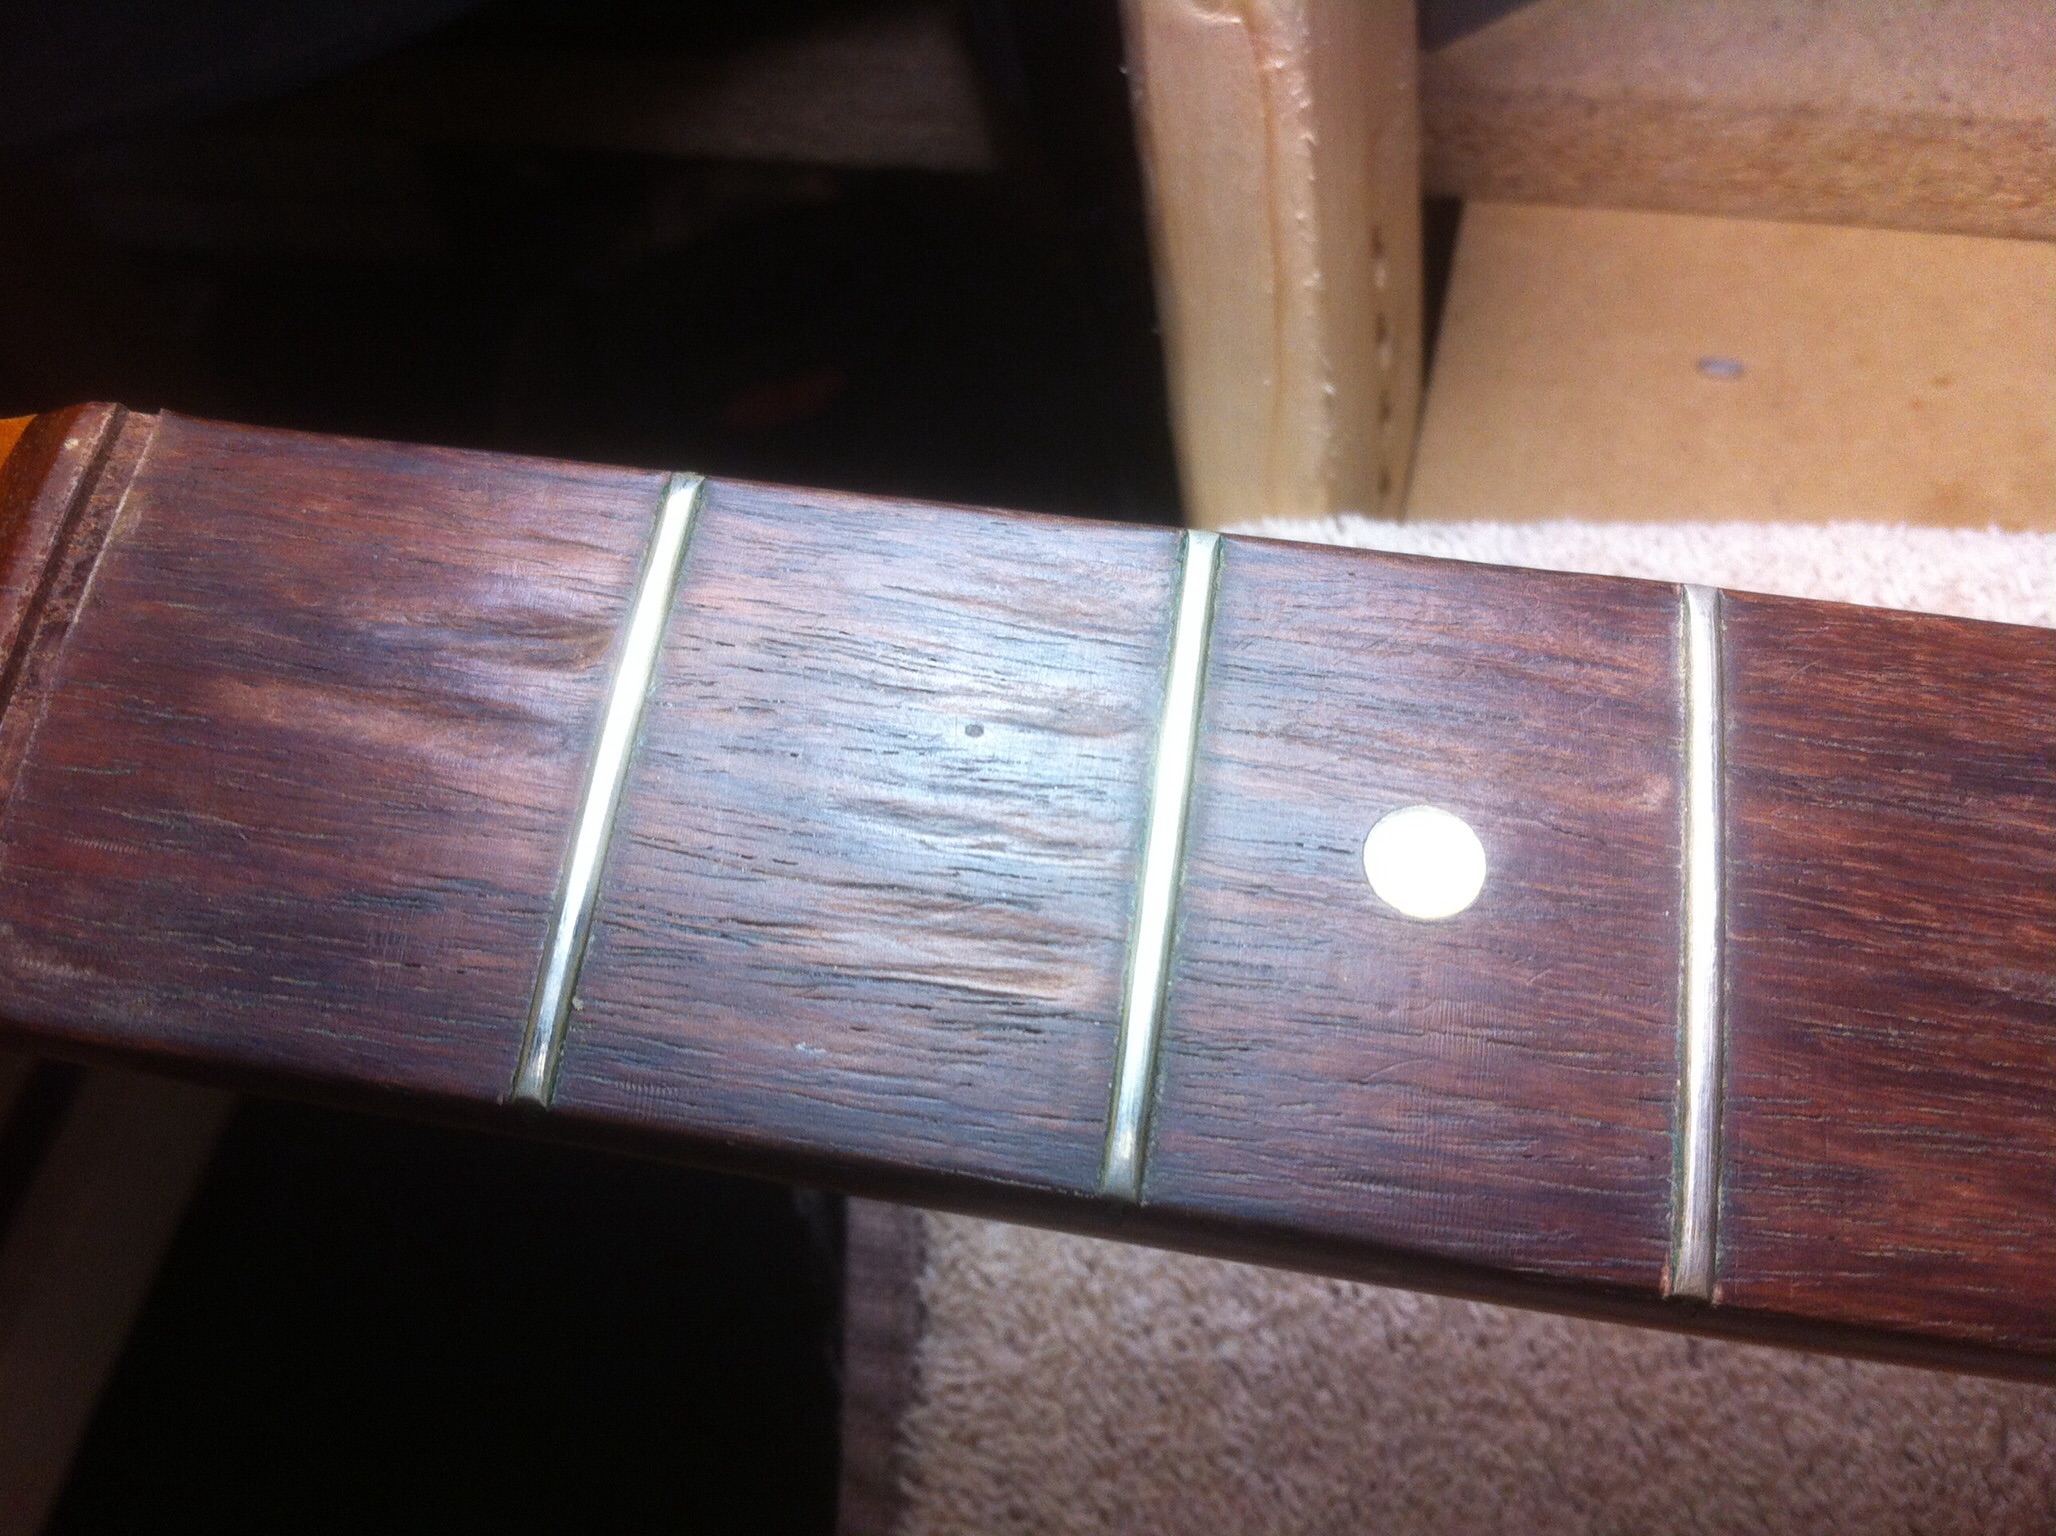

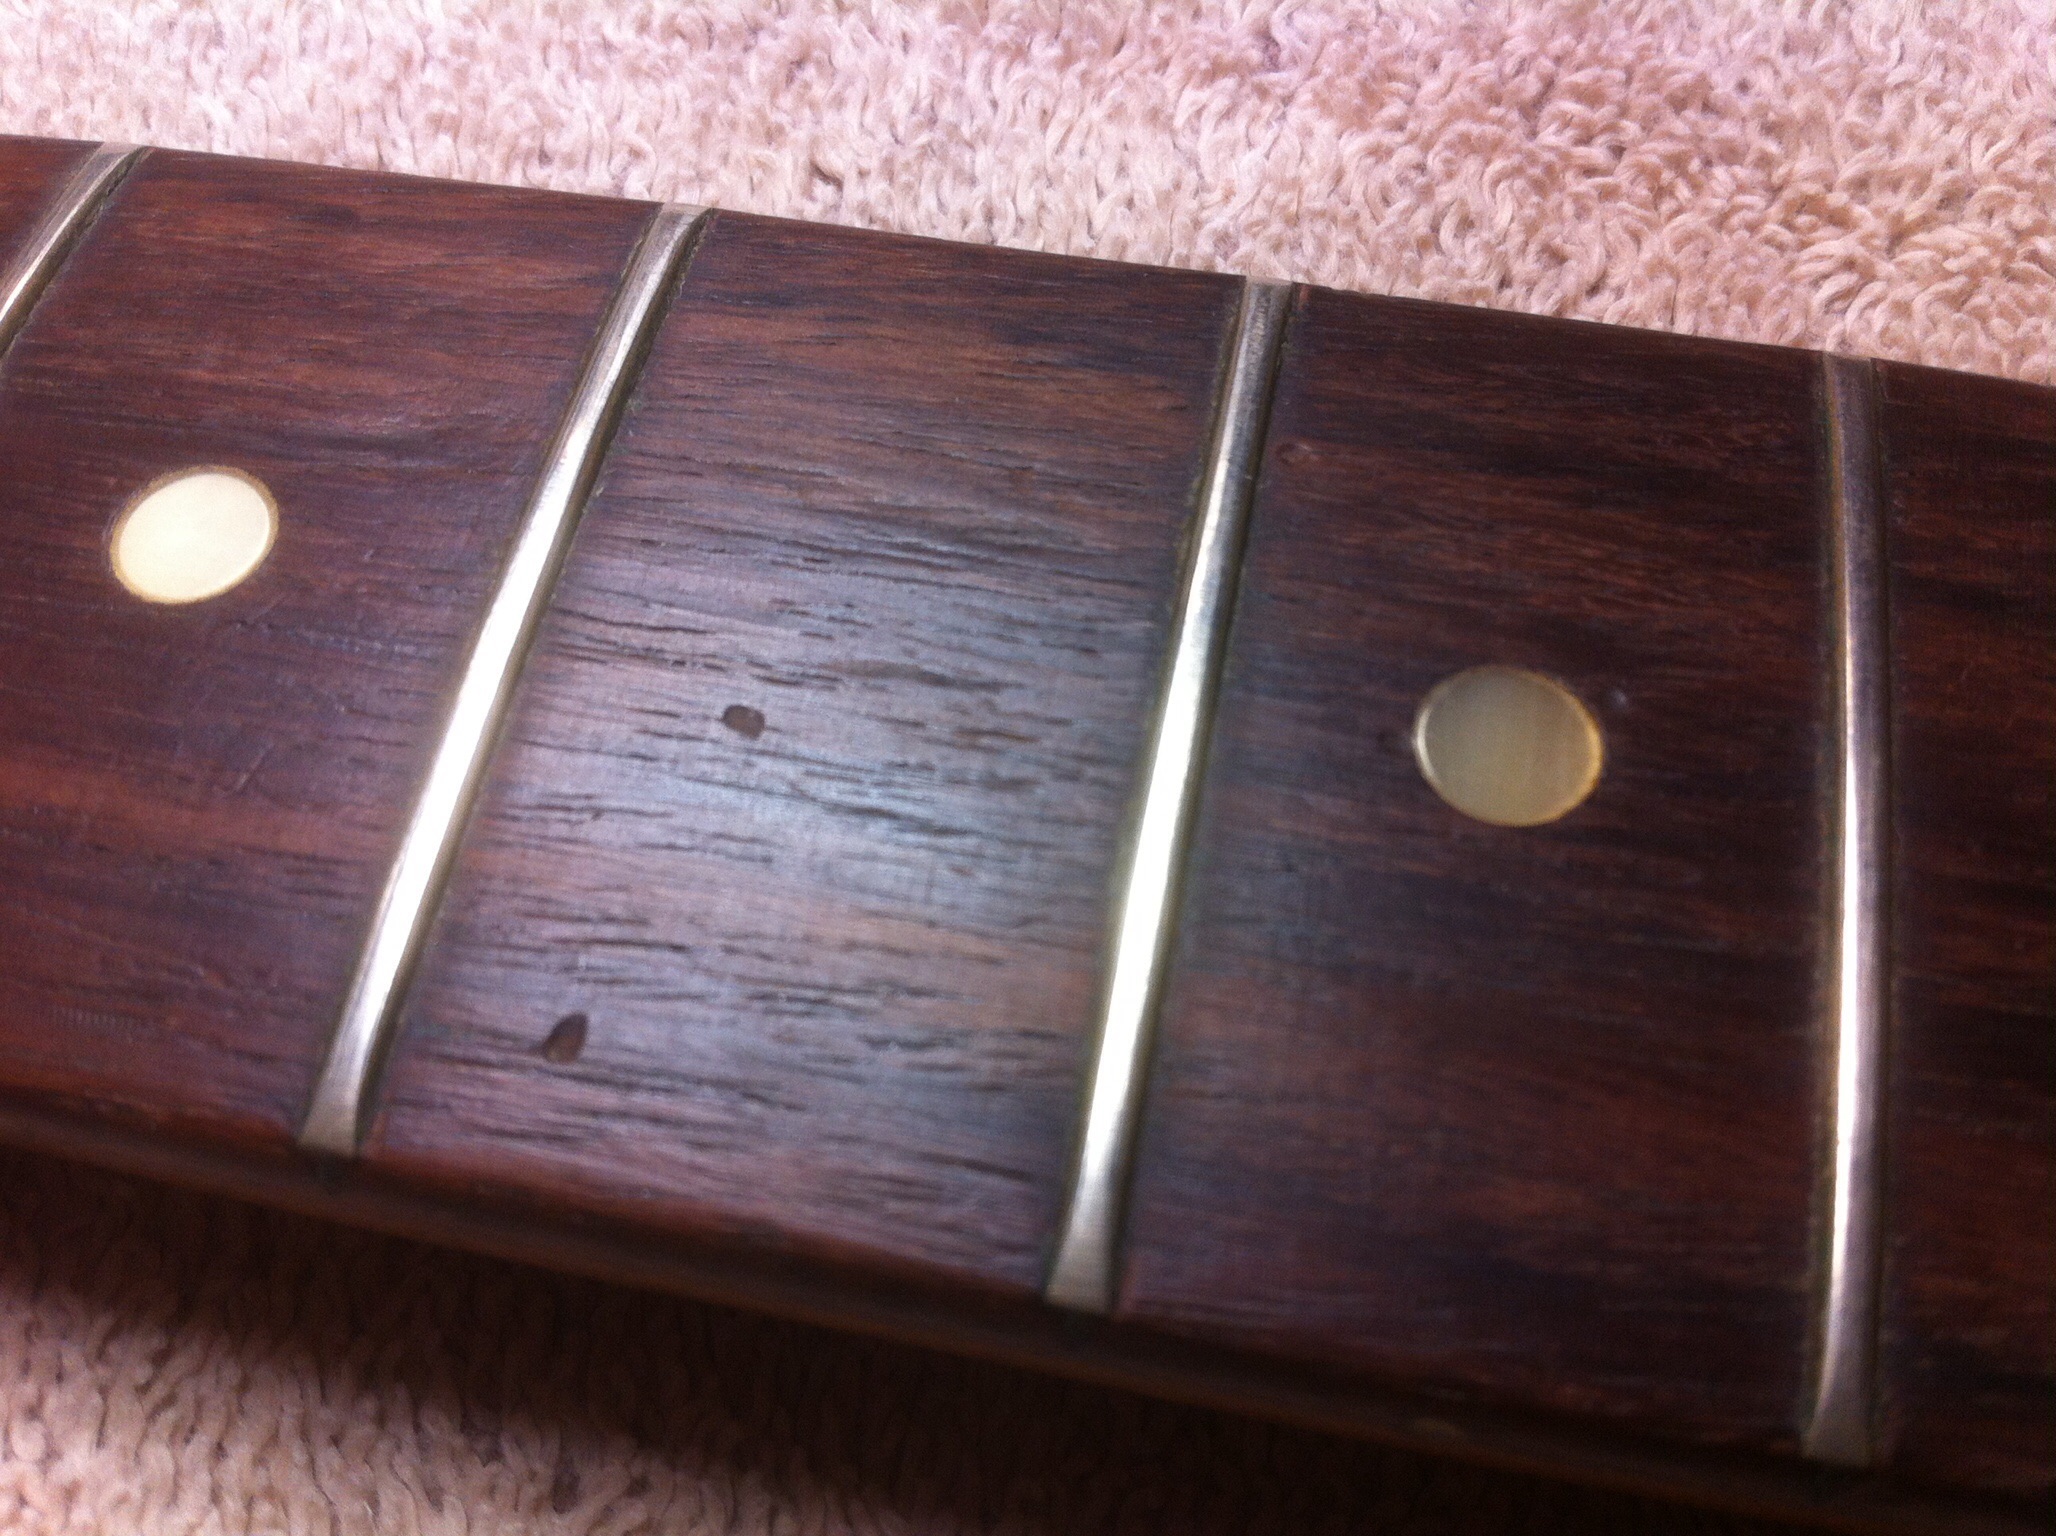
After removing the old fret wire and drop-filling the damaged areas, the fretboard was level sanded, then re-radius-ed to its original factory radius of 7.25″. The board was then treated with boiled linseed oil, and left to air out for several days. New fretwire was installed. The new frets were then precision leveled and crowned by hand, and finally polished out. Fully restored and refretted, the neck was now ready to be reassembled to the body so the instrument could be setup.


Before reassembly and setup, however, there was still quite a bit of work to be done with cleaning and adjusting the Dynamic Fender Vibrato®, and also cleaning the electronics controls. Let’s get on to some real nuts-n-bolts stuff with the ’65 Mustang; the guitar, that is, not the car…
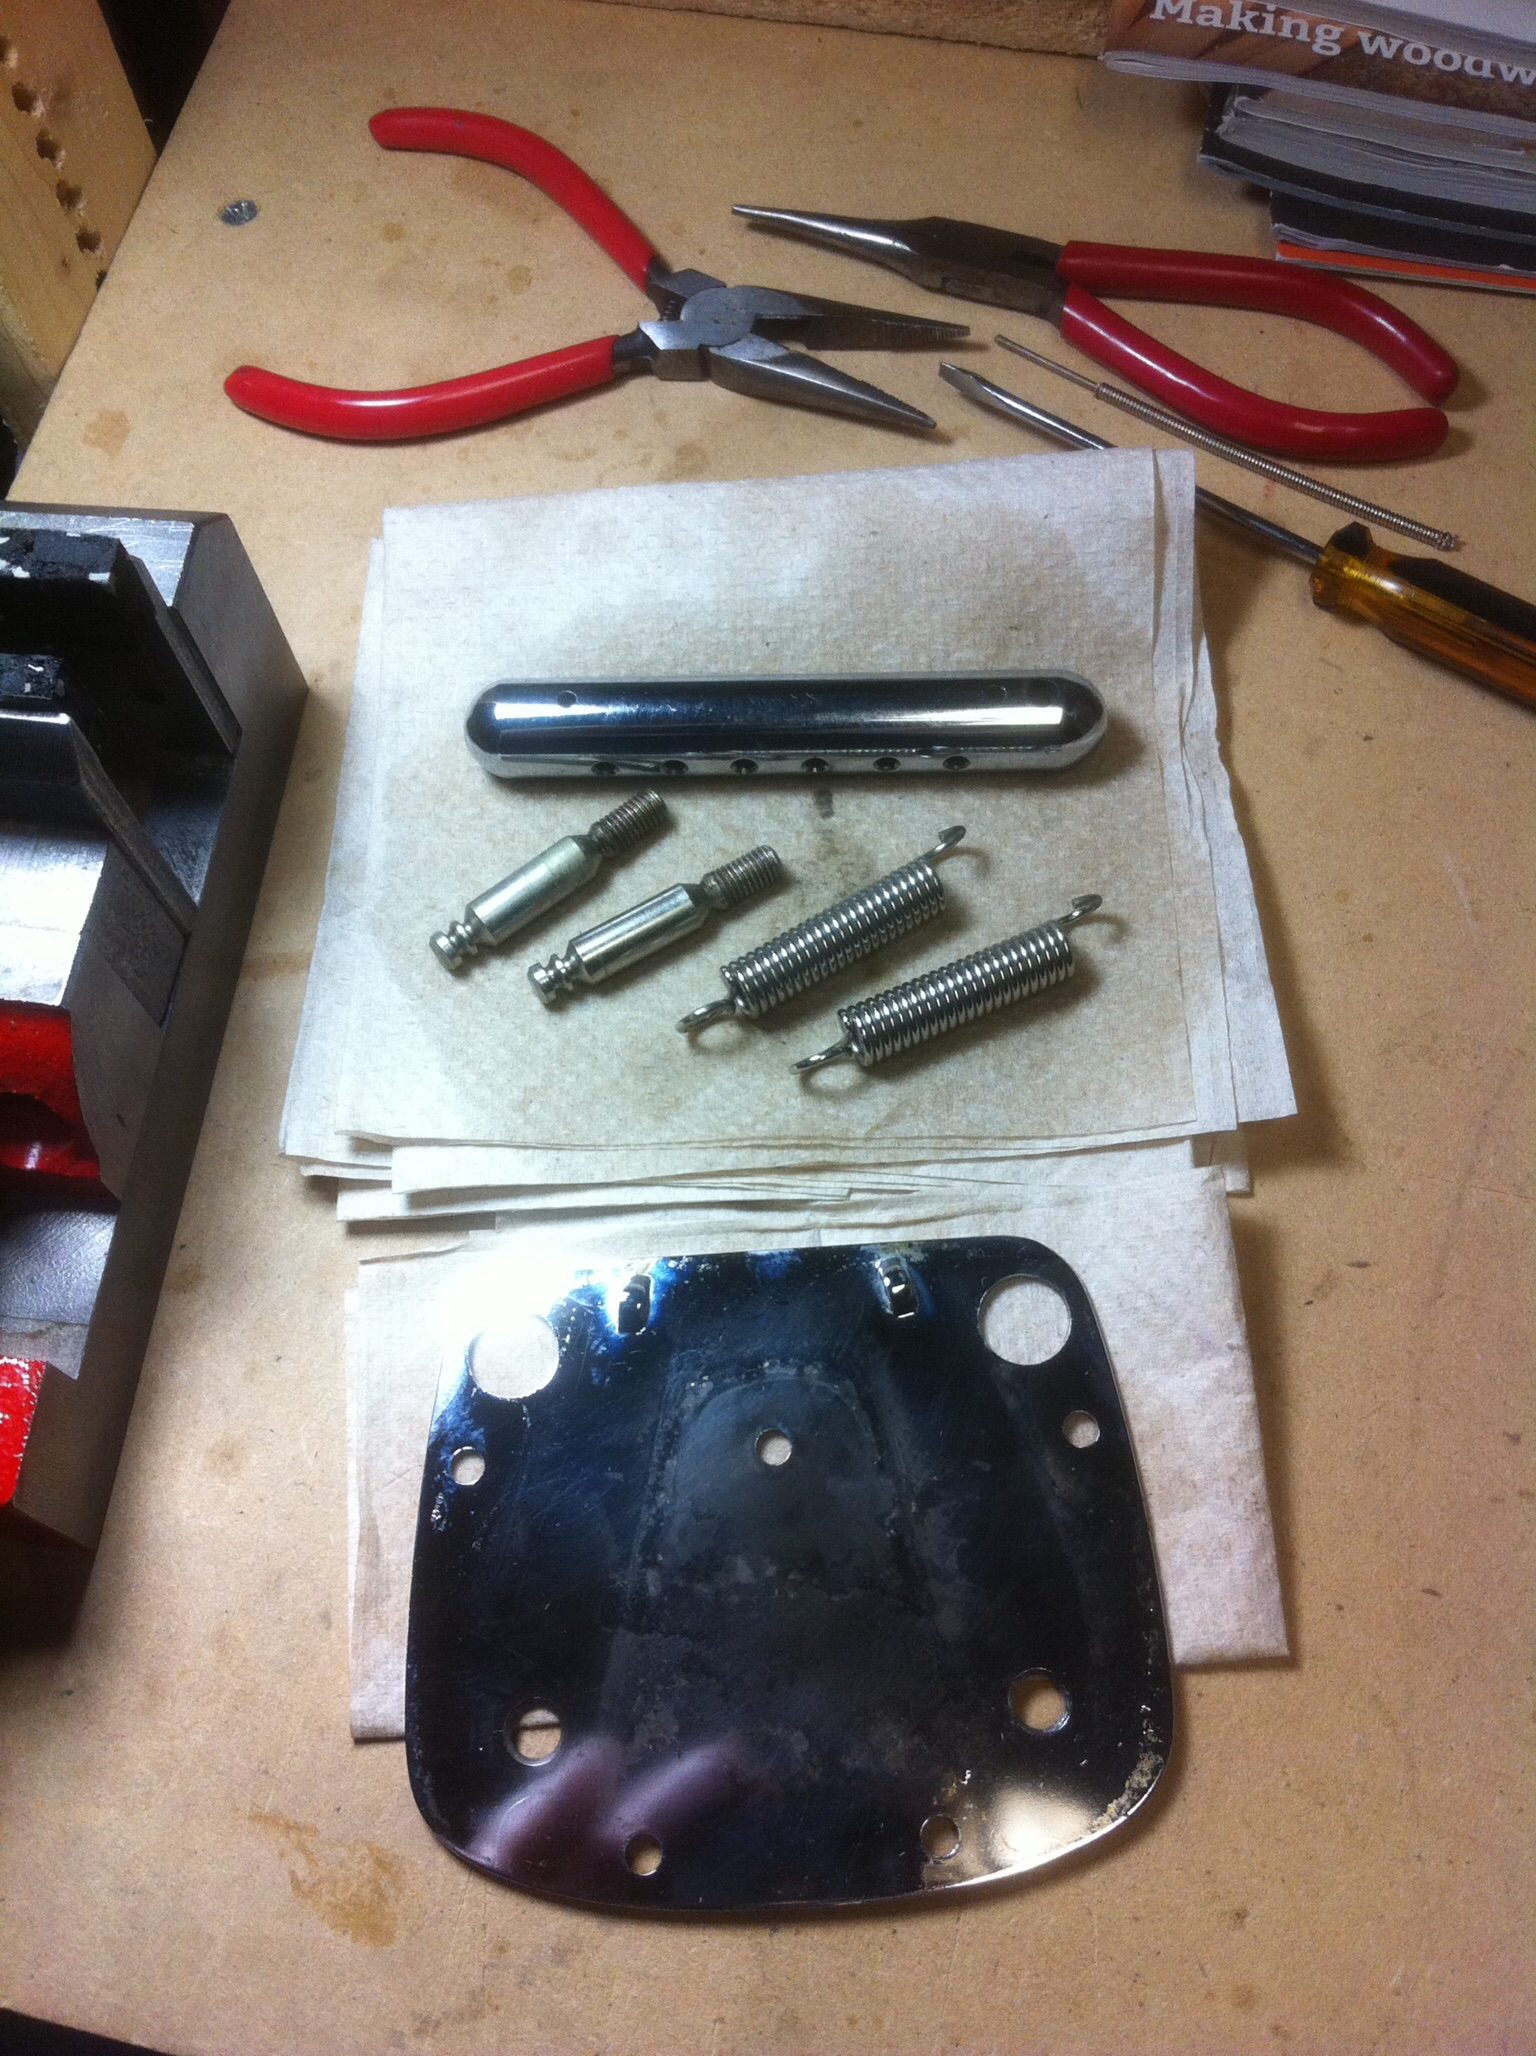
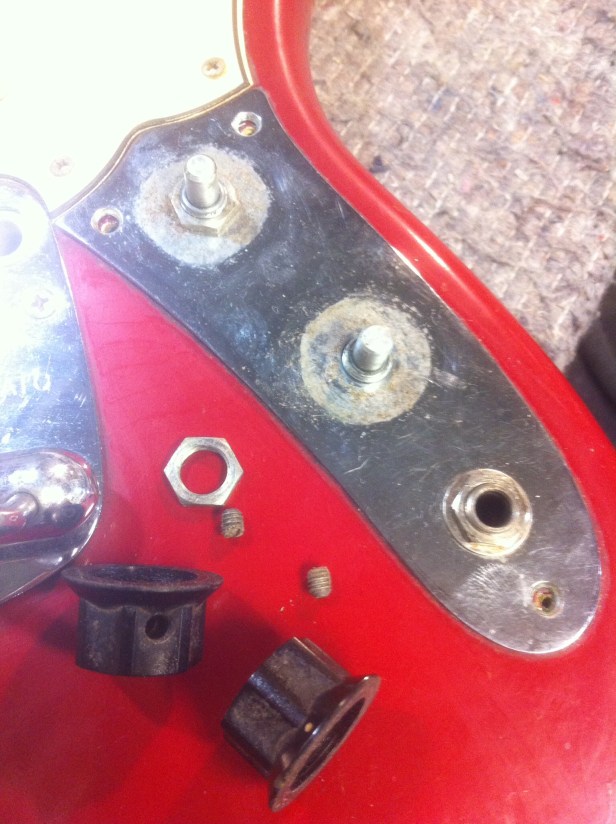
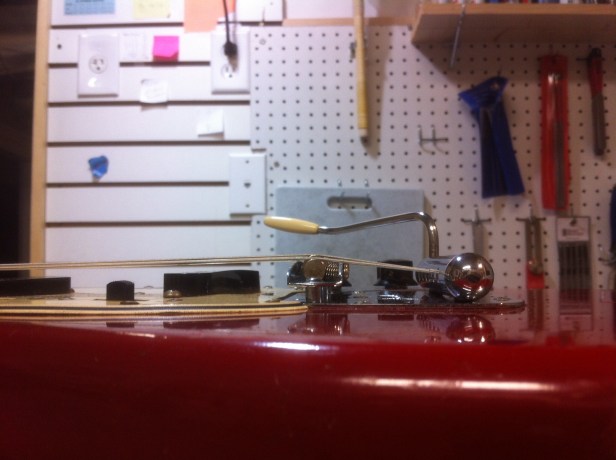
Understanding and adjusting the Dynamic Fender Vibrato is central to getting the Mustang optimally setup. This is NOT a Stratocaster vibrato, so you can’t approach the setup with what you know about adjusting Strats, or any other type guitar that has a “claw tensioning” mechanism attached to a trem block and tailpiece. The Mustang vibrato has no trem block. Instead it has two tension springs attached to two fulcrum posts hidden from sight underneath the bridge and tailpiece base plate. Making adjustments to the spring tension on the Vibrato means removing the strings and the entire hardware assembly from the guitar – i.e. base plate, rocker bridge and stop-bar vibrato tailpiece – in order to access and adjust the springs on the posts. This one was pretty grungy after 50 years. A good bit of elbow grease was necessary to clean and polish it. There were traces everywhere of rust, dirt, and “that green stuff” that looks like nose-cheese. It’s pretty nasty when they get like that.

One of the goals here is to tension the mechanism so when the guitar is tuned to pitch the vibrato arm “floats” at a comfortable level over the body, making it easily accessible to use. Mustangs were notorious for not staying in tune. So another main goal is ensuring the guitar maintains its tuning stability with respect to string gauge and other primary setup adjustments, such as action and relief. The string set used for this setup was Ernie Ball Regulars – .010 through .046, per the customer’s request.
There are two main components that govern the tension on a Dynamic Fender Vibrato. One involves adjusting the height of the stop bar up or down with respect to the base plate. This adjustment is made from the top using a 3/32″ allen wrench in the allen screws on the treble and bass side of the stop bar. Raising the bar lessens tension, and levels off the vibrato arm. The arm is inserted into a socket on the treble side of the bar (it does not screw in) and floats over the body. Raising the bar also reduces some of the sustain. Lowering the stop bar increases tension, and promotes better sustain since we now have a greater break over with the strings coming off the bridge to the tailpiece. Be aware, however, that lowering the stop bar tailpiece too low will also cause the vibrato arm to kick up like a ski slope. If you are a player that enjoys using the whammy bar on a regular basis this would be an uncomfortable setup to maneuver while playing. So if you intend to use the Dynamic Fender Vibrato on your Mustang you are going to want to make adjustments to the stop bar and to the tension springs underneath to find the “sweet spot” for your setup. Or you may just want to bring your Mustang to a competent luthier or guitar tech who understands the “mysteries” of the Dynamic Fender Vibrato system. In which case I know a guy… The “sweet spot” for your setup should provide you with comfortable access to the whammy while maintaining tuning stability for your string gauge, action, and relief requirements. If you don’t really care to use the whammy bar, simply remove it; in which case I recommend lowering the stop bar all the way to the floor on the base plate. This will provide as much sustain and stability as possible. Since tension mainly involves the springs underneath the base plate, height adjustments to the stop bar typically will be made after spring tension has been set.
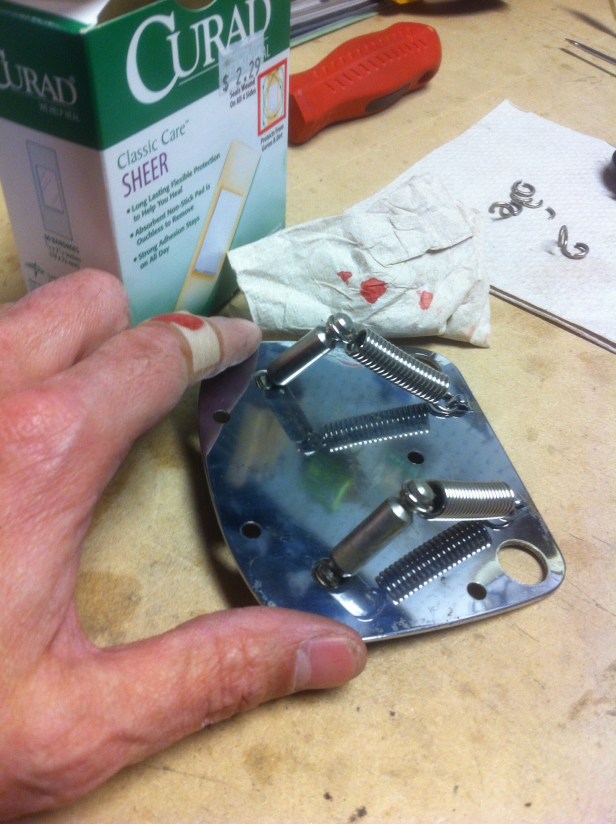
The second and main component having to do with setting the optimum tension for the Dynamic Fender Vibrato involves the springs and the fulcrum posts. These are accessed under the base plate. Let’s take a peek.
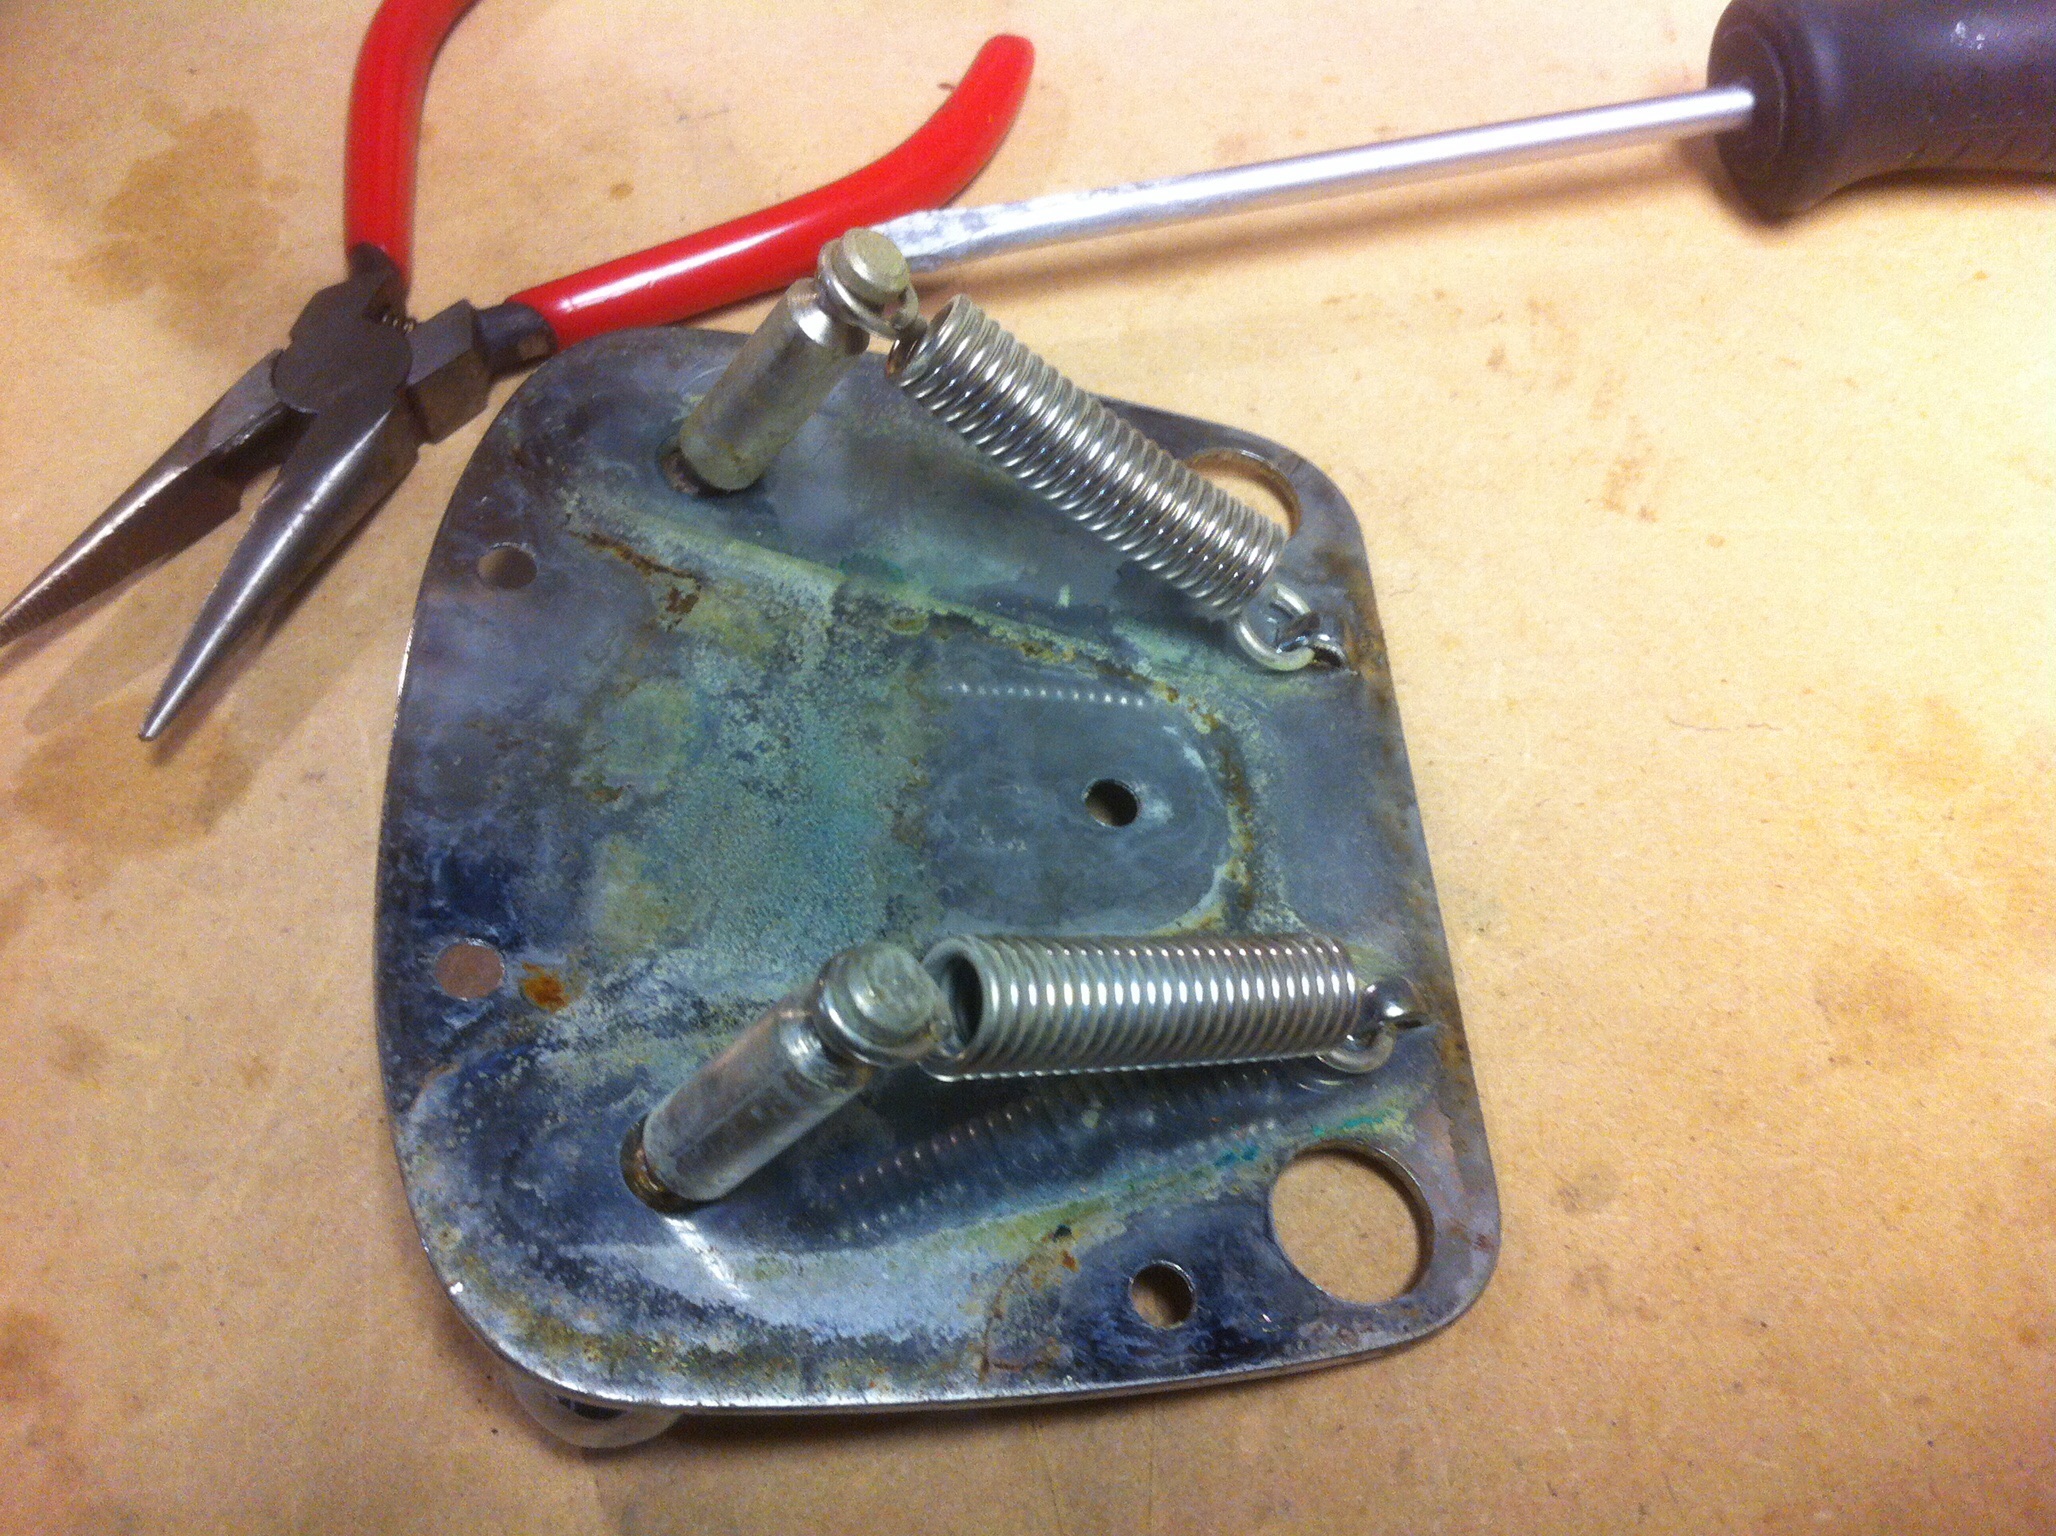
The two fulcrum posts in the picture to the left screw into the bottom of the stop bar through the base plate. The base plate becomes like a knife edge, creating the fulcrum effect on the posts when the Dynamic Fender Vibrato is used under tension. When adjustments are made up or down to the stop bar, as noted above, these posts likewise move along the same trajectory. The tension springs are fastened to the base plate on one end and to either of two adjustment settings, or grooves, on each fulcrum post at the other end. The grooves – one closer to the base plate, one farther away – facilitate the amount of tension applied to the springs within the whole dynamic of the vibrato system. Strapping the springs to the posts on the groove closest to the base plate provides less tension on the Vibrato. This may be a good setup for a slinky set of strings, say .009 through .042. Strapping the springs to the groove farthest from the base plate will produce the highest tension on the Vibrato. Since I was using .010 through .046 gauge strings – a “regular” gauge set – and taking into consideration the short (24″) scale of the Mustang, I wanted the Vibrato to be setup using the greater of the two tension settings on the fulcrum. That was a guess, but it seemed like an “educated” guess that would supply the kind of balance and stability overall that I was looking for in this client’s setup. A short-nosed pliers was needed to open the “eye” on the springs just enough to allow them to be moved along the post from one groove to the other.
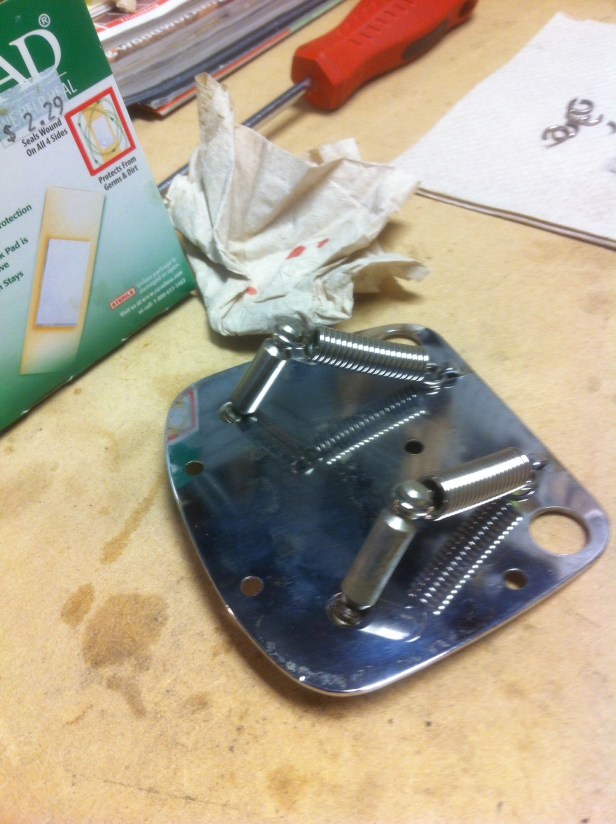
After disassembling and cleaning all of the components of the vibrato system, I reassembled everything using the highest tension settings on the springs and posts, installed the Dynamic Fender Vibrato in the guitar, and strung it up.
The initial setup revealed that even with the highest tension on the springs and posts, and with the stop bar lowered all the way to the base plate, the guitar still failed to hold its tuning and provide a stable setup. This could only mean one thing – the 50 year old tension springs were just plain worn out!
Using a slinkier string set was not a desirable option; the client’s preference for his personal setup was the .010 – .046 set selected. I was just going to have to earn my money on this one! I keep plenty of Strat tremolo springs on hand in the shop, but the springs for the Dynamic Fender Vibrato on a Mustang are not the same size, type, or tensile strength as those found on Strat trems. Having nothing with which to simply replace the worn out Mustang springs, and not wanting to put the project off for several days while waiting on parts, my only option was to modify the old springs, making them shorter, which would apply more tension on the fulcrum posts.
Wow! This was definitely more than I bargained for. Having never setup the Dynamic Fender Vibrato system before, I had no idea what I was in for! But that’s lutherie. You have to love it just to get through it some days. You have to be creative, and think outside the box. Just like life! Having logged close to four decades of professional troubleshooting experience over a wide range of technical disciplines in sometimes mind-boggling problem scenarios, I am a firm believer that within every problem you face, the solution is there staring right back at you. The “skill” is being able to “see” it! To put it another way – there are no problems: only solutions waiting to be discovered, and implemented. If you can clearly visualize your end result chances are you will figure out your problem, and accomplish your goal. Just like life! I like to say, “Life is like building a guitar. First you grow a tree…”
At this point I knew I had to cut the springs shorter on one end, then re-fashion them so they would fasten to the base plate and fulcrum posts again. But which end should I cut from, and how much material should be removed from these tired old springs? And most importantly, would it even work? Clearly, I was in for a long day. I removed the strings, removed the Dynamic Fender Vibrato from the guitar and disassembled it again for the second time.
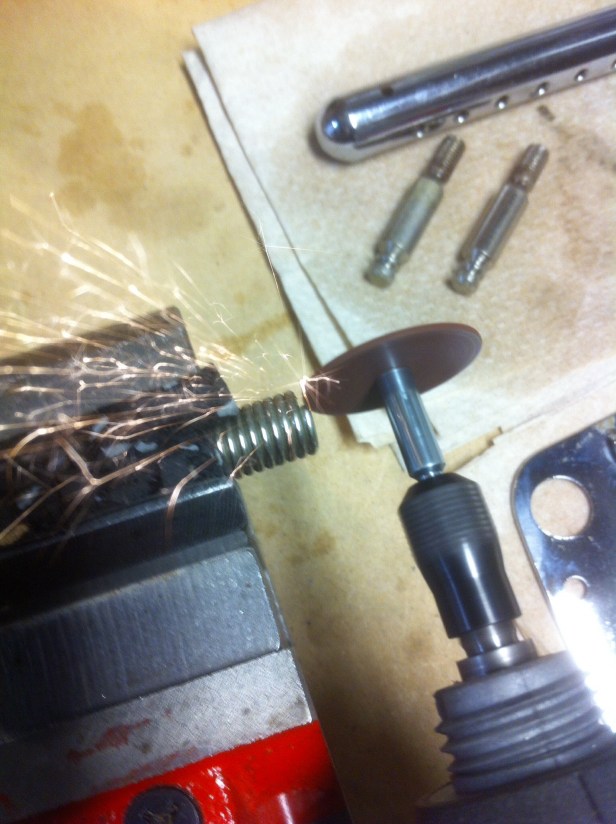
Once I had everything broken down, I decided I would remove about 1/8″ of the coil to start with from the end that fastens to the bottom of the base plate. Using a cutting blade with a Dremel, I went to work on one of the springs, which was secured in a mini-vice.
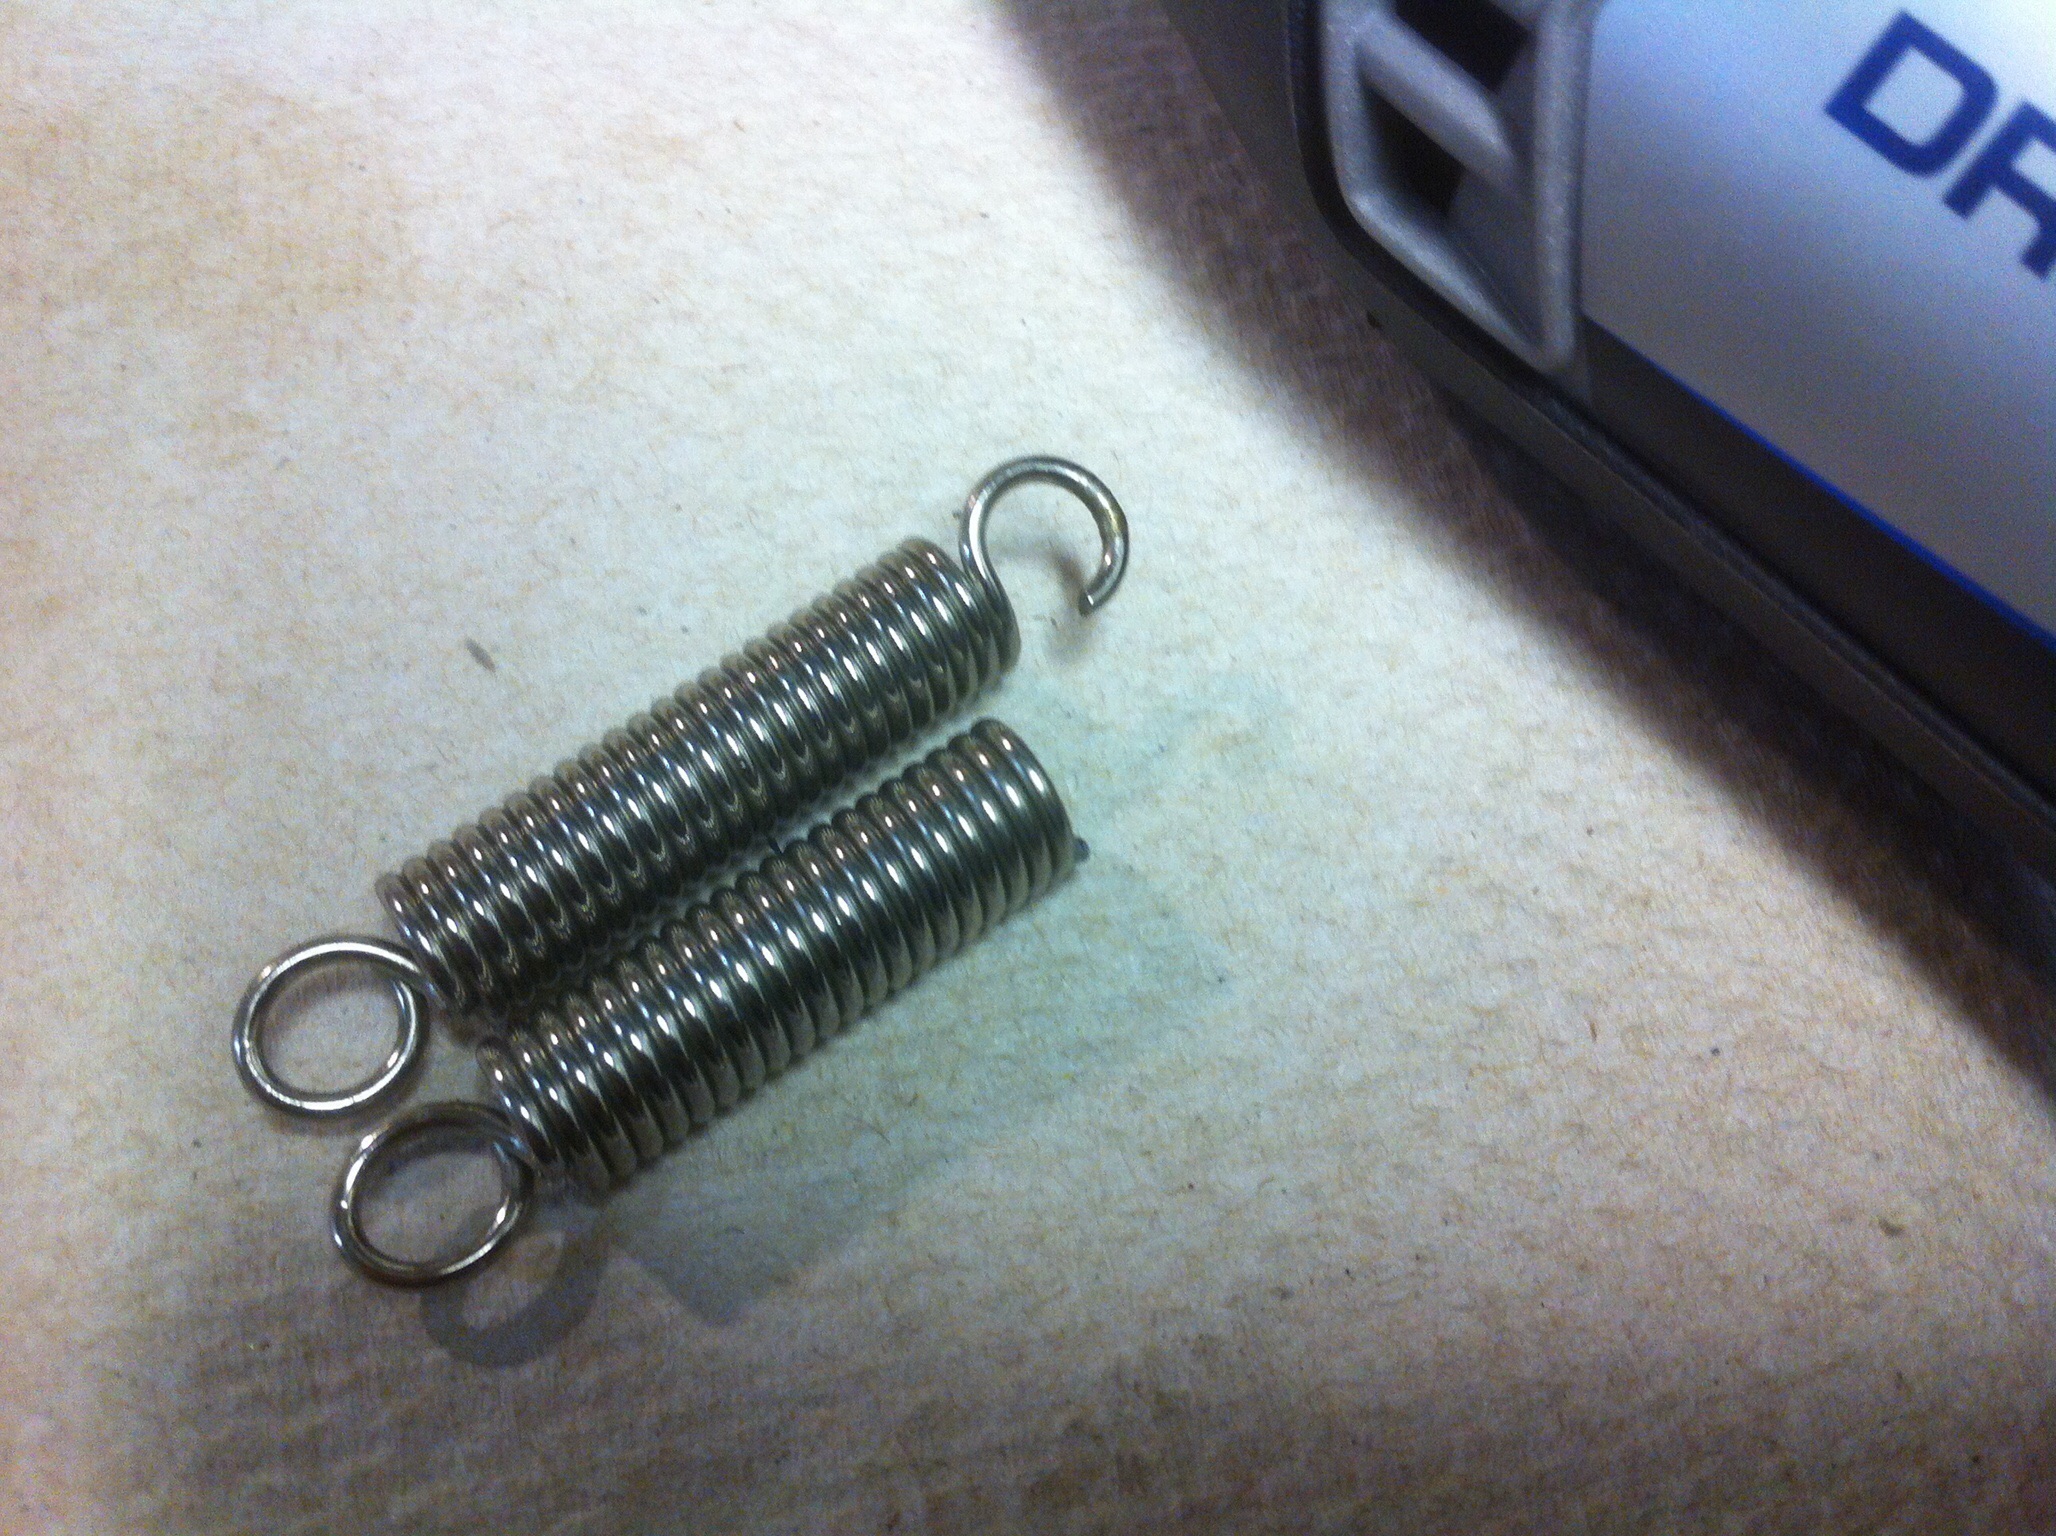
After modifying one of the springs I compared it to the original length of the other. Satisfied I had taken enough off I then shortened the second spring. Both springs where now shorter and the same length.
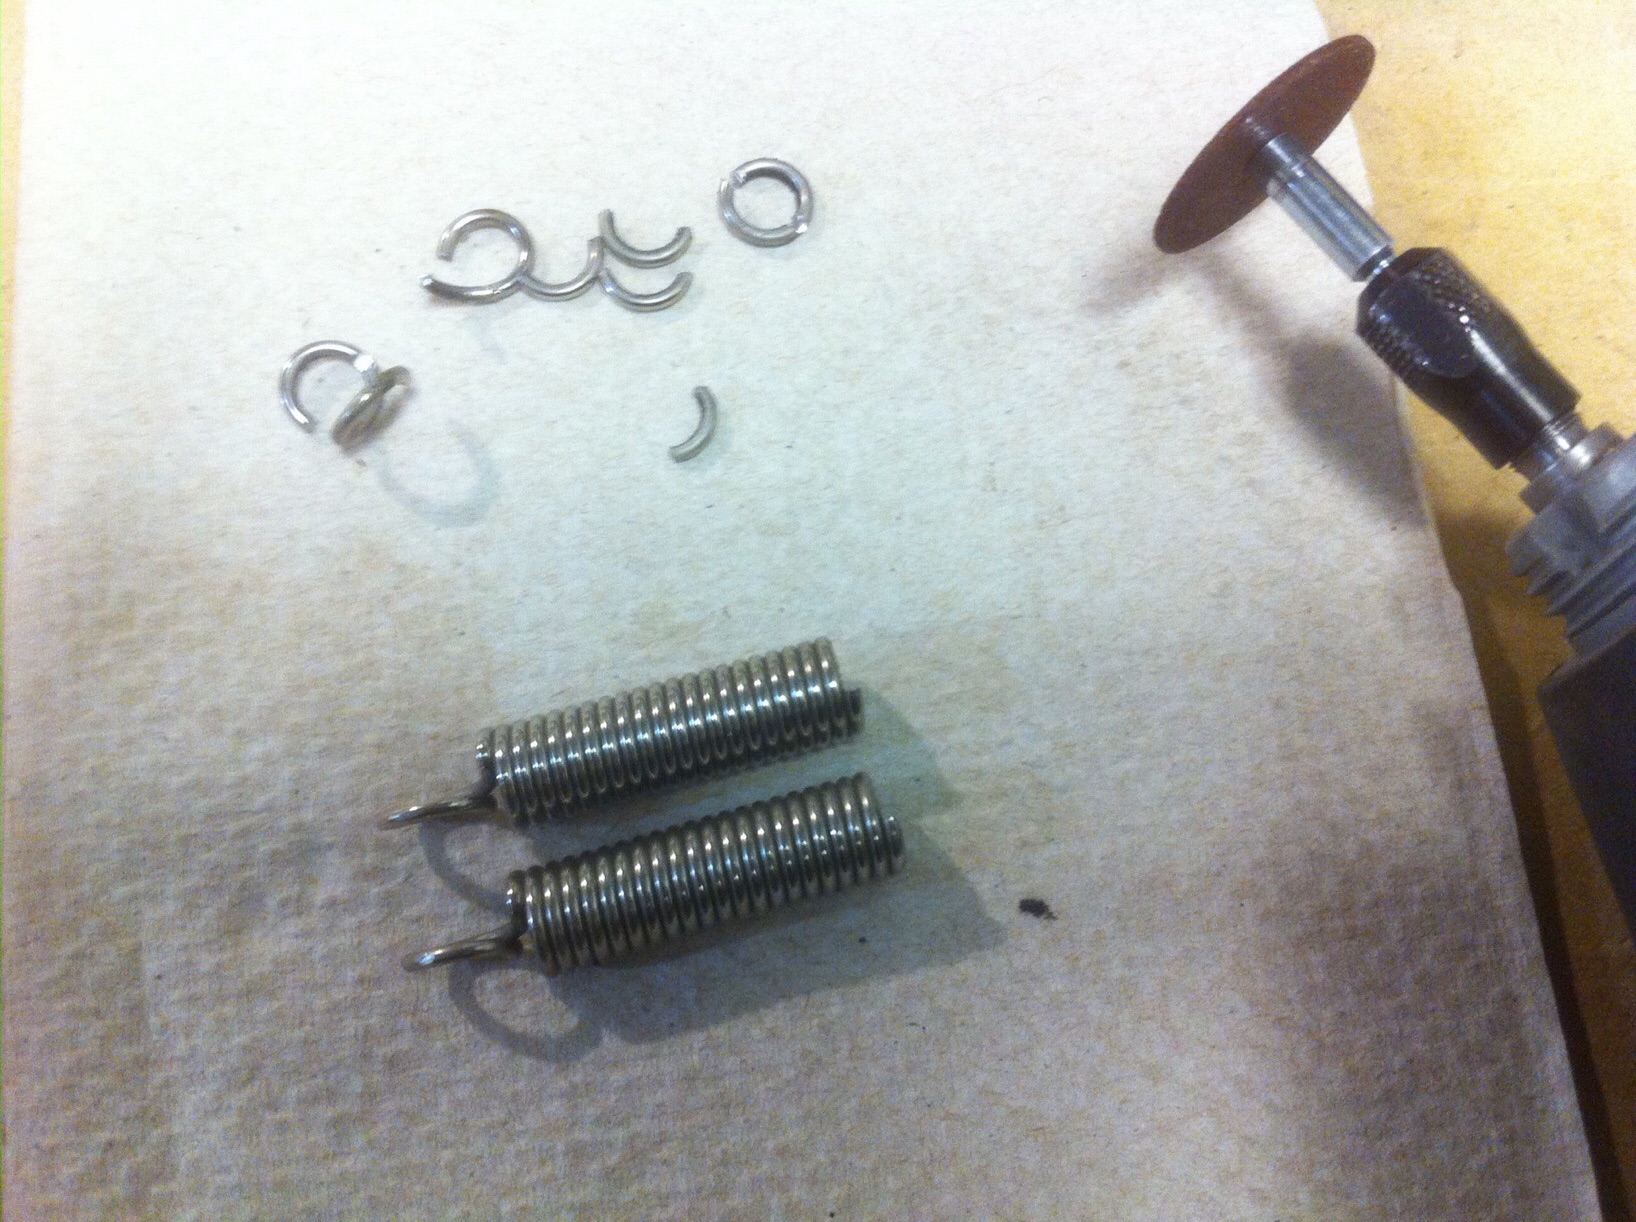
This presented the next challenge: reshaping the hooked ends that fasten to the bottom of the base plate. To do this without risking breaking and/or mangling the chrome springs, I needed to find a way to keep the spring from bending while I reshaped the ends. I reasoned that if I had something rigid to fit inside the spring, and slightly shorter than the spring, it would provide a fulcrum to facilitate the task. A cast iron allen wrench about the same diameter as the inside of the coil and cut down to just about the same length as the shortened spring did the trick!
Fortunately I have a surplus of different sized allens laying around, so I found a match, cut it with the Dremel down to the size I needed, and inserted it into the spring. I then threaded the end of the spring through the padeye on the base plate and fashioned a new hook onto both of the springs. The stub insert supplied the leverage I needed, while the base plate was secured to the bench top using spring clamps.


Inside of an hour, and with bleeding knuckles, the Dynamic Fender Vibrato was fully assembled for the second time, hopefully with an ample amount of tension from the shortened springs. I sure didn’t want to have to rinse and repeat the spring shortening exercise again! Just in case, I kept a box of band aids handy.
After the hardware was thoroughly cleaned and polished the base plate and vibrato system was re-installed. The guitar was then restrung and some additional adjustments were made – such as, leveling the stop bar, adjusting the action at the bridge, the pickup height, relief and final intonation. I was GREATLY relieved to see I had achieved my aim! I had a perfectly balanced setup that stayed in tune, with great action thanks to new, precision leveled, crowned, and polished frets, and a whammy bar that floated with a friendly attitude, easily accessible over the top of the guitar. I cleaned and serviced the electronics controls and finished the setup with a sound check. Yeah buddy! Now I remember why the ’65 Fender Mustang was my “dream guitar” as a kid! LET’S PLAY!!

So. Bloody knuckles and all… “Was it worth it?” you ask…
OH HELLS YEAH!!

’65 Fender Mustang (original, vintage) in Dakota Red
